Introduction & Inspiration
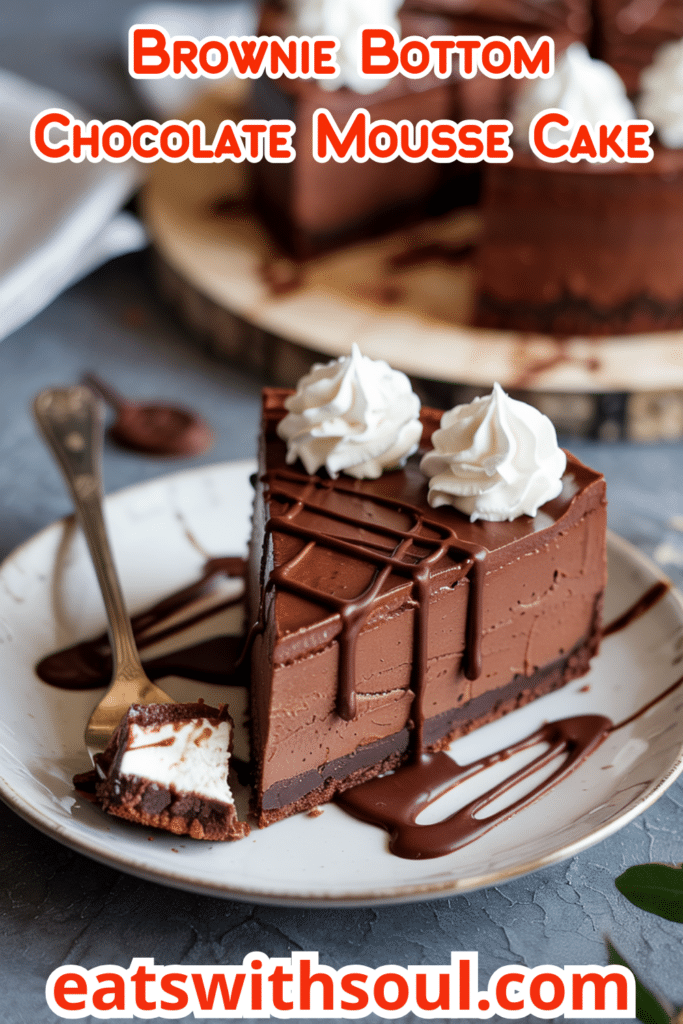
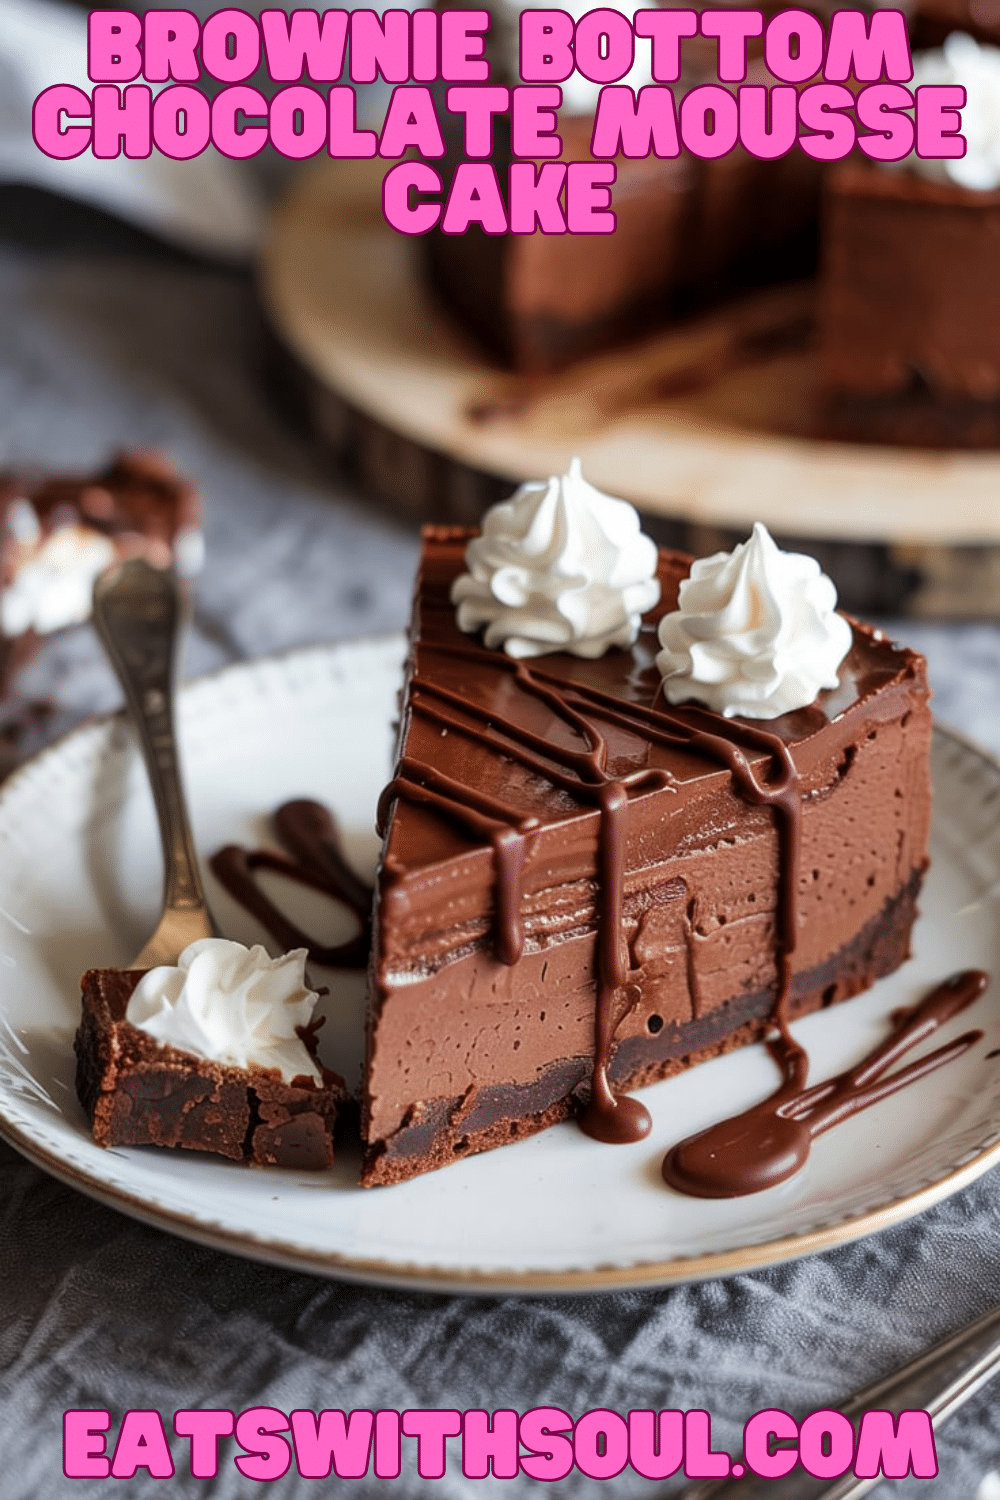
Imagine the ultimate chocolate dessert: a rich, chewy brownie base topped not just with frosting, but with a cloud of light, airy, yet decadent chocolate mousse. That’s exactly what this Brownie Bottom Chocolate Mousse Cake delivers! It’s a stunning combination of textures and deep chocolate flavors, finished with a simple whipped cream topping, hot fudge drizzle, and extra chocolate chips.
My inspiration for this recipe comes from the desire to combine two incredibly satisfying chocolate treats – brownies and mousse – into one impressive dessert. I wanted something that felt luxurious and special, perfect for celebrations, but achievable for home bakers, especially by utilizing a brownie mix for the base.
This cake is perfect for birthdays, dinner parties, or any occasion that calls for a truly showstopping chocolate dessert. The contrast between the dense brownie and the light mousse is absolutely divine. It is a perfect dessert, for chocolate lovers.
Nostalgic Appeal
Brownies are pure nostalgic comfort food for so many of us, reminiscent of bake sales, after-school treats, and simple chocolatey goodness. Chocolate mousse, on the other hand, often feels a bit more elegant and sophisticated, a classic restaurant dessert.
This recipe beautifully marries those feelings. The familiar comfort of the brownie base grounds the light elegance of the chocolate mousse topping, creating a dessert that feels both special and satisfyingly familiar. It’s the best of both chocolate worlds.
It’s a dessert that appeals to both the kid in us who loves brownies and the adult who appreciates a more refined mousse. A perfect combination of flavour and texture.
Homemade Focus (with a Smart Shortcut)
This recipe cleverly uses a brownie mix for the base, which significantly simplifies the process and ensures a consistently good foundation. However, the real star – the light and stable chocolate mousse – is entirely homemade, involving specific techniques like blooming gelatin and folding whipped cream into a chocolate cream cheese base.
Making the mousse layer from scratch allows for control over the texture and intensity of the chocolate flavor. The process of blooming gelatin and gently folding ensures a mousse that is light and airy, yet firm enough to slice beautifully atop the brownie. The fresh whipped cream topping is another simple homemade touch.
It’s about using a convenient base but putting the homemade effort where it counts most – in that luscious mousse layer. It demonstrates how a shortcut can still lead to an impressive, largely homemade dessert. A perfect balance, between homemade and store-bought ingredients.
Flavor Goal
The primary flavor goal is intense, multi-layered chocolate satisfaction with contrasting textures. The brownie base should be rich, chewy, and deeply chocolatey, providing a solid foundation.
The chocolate mousse filling should be lighter in texture but still pack a significant chocolate punch, balanced by the tang of cream cheese and the sweetness of sugar. It shouldn’t be as dense as the brownie but richer than plain whipped cream. The gelatin ensures it sets properly without being rubbery.
The whipped cream topping adds a final layer of light sweetness, while the hot fudge and mini chocolate chips reinforce the chocolate theme and add textural variation. The overall experience should be a decadent journey through chocolate textures – chewy, creamy, and fluffy. A dream dessert, for chocolate lovers.
Ingredient Insights
For the Brownie Base:
- Double Chocolate Brownie Mix (18.3oz): A convenient shortcut for a consistently chewy and chocolatey base. Follow mix instructions for required additions if different from recipe.
- Butter (Melted), Large Eggs, Water: Typical ingredients added to a brownie mix, providing moisture, richness, and structure.
For the Mousse Filling:
- Cream Cheese (Softened): Provides the tangy, creamy base for the mousse, giving it body and richness. Must be fully softened for a smooth texture.
- Water & Gelatin: Used twice! Blooming powdered gelatin in cold water and then gently melting it creates a stabilizer. Adding this to both the chocolate base and the whipped cream ensures the final mousse sets firmly enough to slice cleanly.
- Mini Chocolate Chips: Melted with a bit of cream to create a concentrated chocolate component for the mousse base.
- Heavy Whipping Cream: Used in three places: a small amount with the melted chocolate, a larger amount whipped separately, and a bit added directly to the cream cheese mixture for smoothness. Essential for the light texture. Must be cold for whipping.
- Powdered Sugar: Sweetens the whipped cream component of the mousse.
- Granulated Sugar: Sweetens the cream cheese base of the mousse.
- Cocoa Powder: Adds deep chocolate flavor to the cream cheese base.
- Vanilla Extract: Enhances the chocolate and overall flavors.
For the Topping:
- Heavy Whipping Cream (Cold): For the final decorative whipped cream topping.
- Powdered Sugar: To sweeten the topping.
- Hot Fudge Sauce: For drizzling, adding visual appeal and intense fudge flavor. Store-bought or homemade.
- Mini Chocolate Chips: For sprinkling, adding texture and more chocolate flavor.
Essential Equipment
- 9-Inch Springform Pan: Crucial for building the layers and easily releasing the finished cake.
- Parchment Paper: Essential for lining the bottom (and optionally sides) of the springform pan for easy removal.
- Mixing Bowls (Medium, Small, Metal): For brownie batter, melting chocolate, blooming gelatin, whipping cream (metal bowl chills well).
- Electric Mixer (Handheld or Stand Mixer): Essential for beating cream cheese smooth and whipping cream to stiff peaks.
- Microwave (or Double Boiler): For melting chocolate and re-liquefying gelatin.
- Rubber Spatula: For folding whipped cream and smoothing layers.
- Offset Spatula (Optional): For smoothing the mousse layer evenly.
- Piping Bag and Large Open Star Tip (Optional): For decorative whipped cream border.
Ingredients
For the brownie:
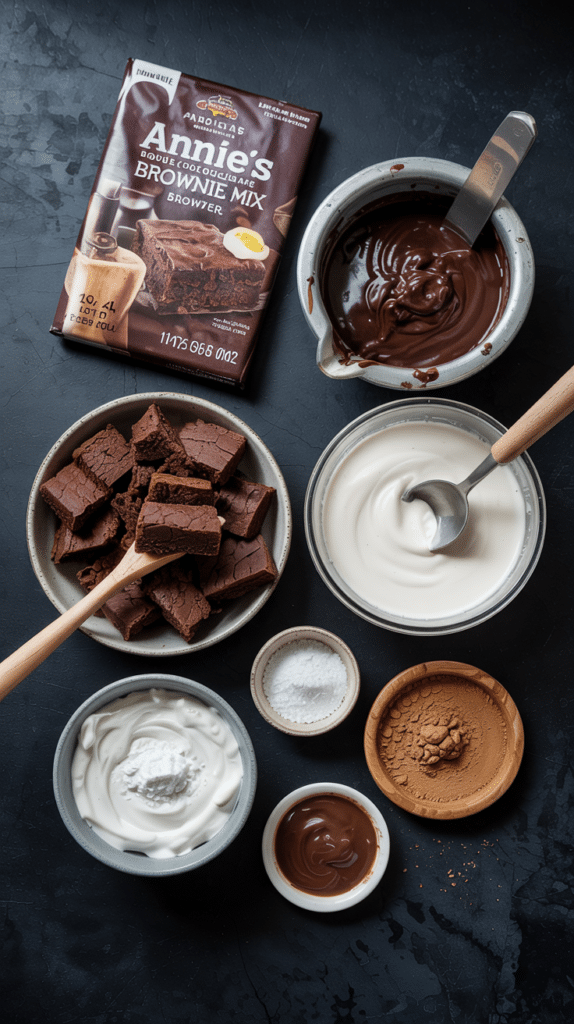
- 1 package Annie’s Double Chocolate Brownie Mix (18.3oz) (or similar mix)
- 1 stick (1/2 cup) butter, melted
- 2 large eggs
- 2 tablespoons water
For the mousse:
- 2 packages cream cheese (8 oz each / 16 oz total), softened
- 2 tablespoons water, divided (1 tbsp + 1 tbsp)
- 2 teaspoons gelatin, divided (1 tsp + 1 tsp)
- ½ cup mini chocolate chips
- 1 cup plus 3 tablespoons heavy whipping cream, divided (1 tbsp + 1 cup + 2 tbsp)
- 3 tablespoons powdered sugar
- ½ cup granulated sugar
- ¼ cup cocoa powder
- 1 teaspoon vanilla extract
For the topping:
- ¾ cup heavy whipping cream, cold
- 3 tablespoons powdered sugar
- 2 tablespoons hot fudge sauce
- ¼ cup mini chocolate chips

Step-by-Step Instructions
1. Make and Bake the Brownie Base:
- Preheat the oven to 350°F (175°C). Line the bottom of a 9-inch springform pan with parchment paper. Grease the parchment and the sides of the pan.
- In a medium-sized bowl, combine the brownie mix, melted butter, eggs, and 2 tablespoons water. Stir until the batter is well combined and no dry streaks remain.
- Pour the batter into the prepared springform pan and spread evenly.
- Bake for 20-24 minutes, or until a toothpick inserted into the center comes out clean or with fudgy crumbs (follow mix instructions, adjusting slightly for the pan size if needed).
- Allow the brownie to cool completely in the pan on a wire rack.
2. Prepare Mousse Components:
- Bloom Gelatin (Batch 1): In a small dish, sprinkle 1 teaspoon of gelatin over 1 tablespoon of cold water. Let it sit for 5-10 minutes until it solidifies or “blooms.”
- Melt Chocolate: In a microwave-safe bowl, combine the mini chocolate chips and 1 tablespoon of heavy whipping cream. Microwave in 30-second increments, stirring in between, until the chocolate is melted and smooth.
- Add Gelatin to Chocolate: Microwave the bloomed gelatin (Batch 1) for 8-10 seconds until it turns back into a liquid. Immediately pour the liquid gelatin into the melted chocolate mixture and stir well to combine. Set aside to cool slightly.
- Chill Mixing Bowl: Place a medium-sized metal mixing bowl in the freezer for 5-10 minutes to chill.
- Bloom Gelatin (Batch 2): Prepare a second batch of gelatin exactly like the first: sprinkle 1 teaspoon gelatin over 1 tablespoon cold water and let bloom.
- Whip Cream: Pour 1 cup of cold heavy whipping cream into the chilled bowl. Beat with an electric mixer on medium-high speed until it starts to thicken.
- Add Gelatin & Sugar to Cream: Microwave the bloomed gelatin (Batch 2) for 8-10 seconds until liquid. With the mixer on low speed, slowly pour the liquid gelatin into the thickening cream. Increase speed to high, add the 3 tablespoons powdered sugar, and continue beating until stiff peaks form. Set this stabilized whipped cream aside.
3. Make the Chocolate Mousse Base:
- In a large bowl (you can use the mixer bowl), beat the softened cream cheese on medium-high speed for 2-3 minutes until completely smooth, scraping the bowl occasionally.
- Add the granulated sugar and beat until well combined.
- Add the cocoa powder and beat until well combined, scraping down the bowl occasionally.
- Slowly add the remaining 2 tablespoons of heavy whipping cream and the teaspoon of vanilla extract; continue beating until combined and smooth.
- Add the slightly cooled melted chocolate-gelatin mixture and mix thoroughly until fully incorporated.
4. Finish the Mousse:
- Gently fold the prepared stabilized whipped cream (from step 2) into the chocolate cream cheese mixture using a rubber spatula. Stir gently from bottom to top until the mixture is well combined and no streaks remain. Be careful not to deflate the whipped cream too much.
5. Assemble the Cake:
- Ensure the brownie base is completely cool in the springform pan. Lining the sides of the pan with parchment paper or an acetate cake collar at this stage can help create cleaner sides.
- Pour the chocolate mousse filling over the cooled brownie base. Spread it evenly with an offset spatula or the back of a spoon.
6. Chill Thoroughly:
- Refrigerate the cake for at least 4 hours, or preferably overnight, until the mousse is completely set and firm.
7. Make Topping and Decorate:
- Prior to serving, prepare the whipped cream topping. Place another medium-sized metal mixing bowl in the freezer for 5-10 minutes to chill.
- Pour the remaining ¾ cup cold heavy whipping cream into the chilled bowl. Beat on medium-high speed until it starts to thicken.
- Add the 3 tablespoons powdered sugar and continue beating on high speed until stiff peaks form.
- Optional Piping: Transfer the whipped cream to a piping bag fitted with a large open star tip and pipe a decorative border around the top edge of the chilled mousse cake. (Alternatively, just spread the whipped cream on top).
- Drizzle the top of the cake (or the whipped cream border) with hot fudge sauce.
- Sprinkle with the additional mini chocolate chips.
8. Serve:
- Carefully run a thin knife around the edge of the cheesecake to loosen it from the springform pan sides (if you didn’t use a collar). Release and remove the pan sides.
- Slice and serve chilled.

Troubleshooting
- Brownie Too Hard/Dry: Likely overbaked. Check brownie doneness carefully.
- Mousse Not Setting: Ensure gelatin was properly bloomed and incorporated while liquid. Needs sufficient chilling time (4+ hours). Cream cheese needs to be full fat.
- Mousse Lumpy: Cream cheese wasn’t fully softened or beaten smooth before adding other ingredients. Melted chocolate might have been too hot or too cold.
- Gelatin Clumped: Ensure water for blooming is cold. Melt gently and stir immediately into the intended mixture (chocolate or cream).
- Topping Whipped Cream Runny: Ensure cream and bowl were very cold. Don’t over or under whip.
Tips and Variations
- Homemade Brownies: Use your favorite 8×8 or 9×9 chewy brownie recipe baked in the springform pan instead of a mix. Adjust baking time as needed.
- Different Chocolate: Use milk chocolate or dark chocolate chips for melting into the mousse, adjusting sugar slightly if needed.
- No Gelatin? You can omit the gelatin, but the mousse will be much softer, less stable, and more like a very thick pudding – it might not slice as cleanly.
- Extracts: Add 1/2 tsp of espresso powder to the mousse base for a mocha flavor, or use almond extract instead of vanilla.
- Different Toppings: Use chocolate shavings, caramel sauce, or chopped nuts instead of/in addition to the fudge and chips.
Serving and Pairing Suggestions
- Serve Chilled: This dessert must be served cold.
- With Coffee: The richness pairs perfectly with coffee or espresso.
- With Milk: A classic accompaniment to brownies and chocolate.
- Celebration Dessert: Perfect for birthdays or parties due to its impressive look and decadent taste.
Nutritional Information
(Note: Highly estimated, per slice, assuming 12 slices. Depends heavily on brownie mix used.)
- Calories: 550-700+
- Fat: 35-50g+
- Saturated Fat: 20-30g+
- Cholesterol: 100-140mg+
- Sodium: 200-300mg+
- Total Carbohydrates: 50-65g+
- Dietary Fiber: 3-5g+
- Sugars: 35-50g+
- Protein: 7-10g+
Brownie Bottom Chocolate Mousse Cake: A Decadent Duo
Indulge in a Brownie Bottom Chocolate Mousse Cake! Features a chewy brownie base topped with a light, stabilized chocolate mousse and finished with whipped cream and hot fudge.
Ingredients
For the brownie:
- 1 package Annie’s Double Chocolate Brownie Mix (18.3oz) (or similar mix)
- 1 stick (1/2 cup) butter, melted
- 2 large eggs
- 2 tablespoons water
For the mousse:
- 2 packages cream cheese (8 oz each / 16 oz total), softened
- 2 tablespoons water, divided (1 tbsp + 1 tbsp)
- 2 teaspoons gelatin, divided (1 tsp + 1 tsp)
- ½ cup mini chocolate chips
- 1 cup plus 3 tablespoons heavy whipping cream, divided (1 tbsp + 1 cup + 2 tbsp)
- 3 tablespoons powdered sugar
- ½ cup granulated sugar
- ¼ cup cocoa powder
- 1 teaspoon vanilla extract
For the topping:
- ¾ cup heavy whipping cream, cold
- 3 tablespoons powdered sugar
- 2 tablespoons hot fudge sauce
- ¼ cup mini chocolate chips
Instructions
1. Make and Bake the Brownie Base:
- Preheat the oven to 350°F (175°C). Line the bottom of a 9-inch springform pan with parchment paper. Grease the parchment and the sides of the pan.
- In a medium-sized bowl, combine the brownie mix, melted butter, eggs, and 2 tablespoons water. Stir until the batter is well combined and no dry streaks remain.
- Pour the batter into the prepared springform pan and spread evenly.
- Bake for 20-24 minutes, or until a toothpick inserted into the center comes out clean or with fudgy crumbs (follow mix instructions, adjusting slightly for the pan size if needed).
- Allow the brownie to cool completely in the pan on a wire rack.
2. Prepare Mousse Components:
- Bloom Gelatin (Batch 1): In a small dish, sprinkle 1 teaspoon of gelatin over 1 tablespoon of cold water. Let it sit for 5-10 minutes until it solidifies or “blooms.”
- Melt Chocolate: In a microwave-safe bowl, combine the mini chocolate chips and 1 tablespoon of heavy whipping cream. Microwave in 30-second increments, stirring in between, until the chocolate is melted and smooth.
- Add Gelatin to Chocolate: Microwave the bloomed gelatin (Batch 1) for 8-10 seconds until it turns back into a liquid. Immediately pour the liquid gelatin into the melted chocolate mixture and stir well to combine. Set aside to cool slightly.
- Chill Mixing Bowl: Place a medium-sized metal mixing bowl in the freezer for 5-10 minutes to chill.
- Bloom Gelatin (Batch 2): Prepare a second batch of gelatin exactly like the first: sprinkle 1 teaspoon gelatin over 1 tablespoon cold water and let bloom.
- Whip Cream: Pour 1 cup of cold heavy whipping cream into the chilled bowl. Beat with an electric mixer on medium-high speed until it starts to thicken.
- Add Gelatin & Sugar to Cream: Microwave the bloomed gelatin (Batch 2) for 8-10 seconds until liquid. With the mixer on low speed, slowly pour the liquid gelatin into the thickening cream. Increase speed to high, add the 3 tablespoons powdered sugar, and continue beating until stiff peaks form. Set this stabilized whipped cream aside.
3. Make the Chocolate Mousse Base:
- In a large bowl (you can use the mixer bowl), beat the softened cream cheese on medium-high speed for 2-3 minutes until completely smooth, scraping the bowl occasionally.
- Add the granulated sugar and beat until well combined.
- Add the cocoa powder and beat until well combined, scraping down the bowl occasionally.
- Slowly add the remaining 2 tablespoons of heavy whipping cream and the teaspoon of vanilla extract; continue beating until combined and smooth.
- Add the slightly cooled melted chocolate-gelatin mixture and mix thoroughly until fully incorporated.
4. Finish the Mousse:
- Gently fold the prepared stabilized whipped cream (from step 2) into the chocolate cream cheese mixture using a rubber spatula. Stir gently from bottom to top until the mixture is well combined and no streaks remain. Be careful not to deflate the whipped cream too much.
5. Assemble the Cake:
- Ensure the brownie base is completely cool in the springform pan. Lining the sides of the pan with parchment paper or an acetate cake collar at this stage can help create cleaner sides.
- Pour the chocolate mousse filling over the cooled brownie base. Spread it evenly with an offset spatula or the back of a spoon.
6. Chill Thoroughly:
- Refrigerate the cake for at least 4 hours, or preferably overnight, until the mousse is completely set and firm.
7. Make Topping and Decorate:
- Prior to serving, prepare the whipped cream topping. Place another medium-sized metal mixing bowl in the freezer for 5-10 minutes to chill.
- Pour the remaining ¾ cup cold heavy whipping cream into the chilled bowl. Beat on medium-high speed until it starts to thicken.
- Add the 3 tablespoons powdered sugar and continue beating on high speed until stiff peaks form.
- Optional Piping: Transfer the whipped cream to a piping bag fitted with a large open star tip and pipe a decorative border around the top edge of the chilled mousse cake. (Alternatively, just spread the whipped cream on top).
- Drizzle the top of the cake (or the whipped cream border) with hot fudge sauce.
- Sprinkle with the additional mini chocolate chips.
8. Serve:
- Carefully run a thin knife around the edge of the cheesecake to loosen it from the springform pan sides (if you didn’t use a collar). Release and remove the pan sides.
- Slice and serve chilled.
Recipe Summary and Q&A
Summary: This Brownie Bottom Chocolate Mousse Cake starts with a baked brownie base (from a mix) in a springform pan. It’s topped with a homemade, stabilized chocolate mousse made with cream cheese, melted chocolate, cocoa, whipped cream, and gelatin. After chilling until firm, it’s decorated with fresh whipped cream, hot fudge sauce, and mini chocolate chips.
Q&A:
- Q: Why use gelatin in the mousse?
- A: The gelatin helps stabilize the mousse, giving it enough structure to hold its shape when sliced on top of the brownie layer. It ensures a light texture that still sets firmly.
- Q: Can I make this without a springform pan?
- A: It’s highly recommended. You could try assembling it in a deep 9-inch square pan lined with parchment overhang, but removing slices cleanly will be much more difficult.
- Q: How far in advance can I make this?
- A: You can make the full cake (up to the final topping) a day or two in advance. Keep it covered and refrigerated. Add the final whipped cream, fudge, and chips just before serving for best appearance.
- Q: Can I freeze this dessert?
- A: Yes, this dessert should freeze well. Wrap tightly after the mousse is set. Thaw in the refrigerator for several hours before adding the final topping and serving. The brownie texture might change slightly upon thawing.

