Introduction & Inspiration
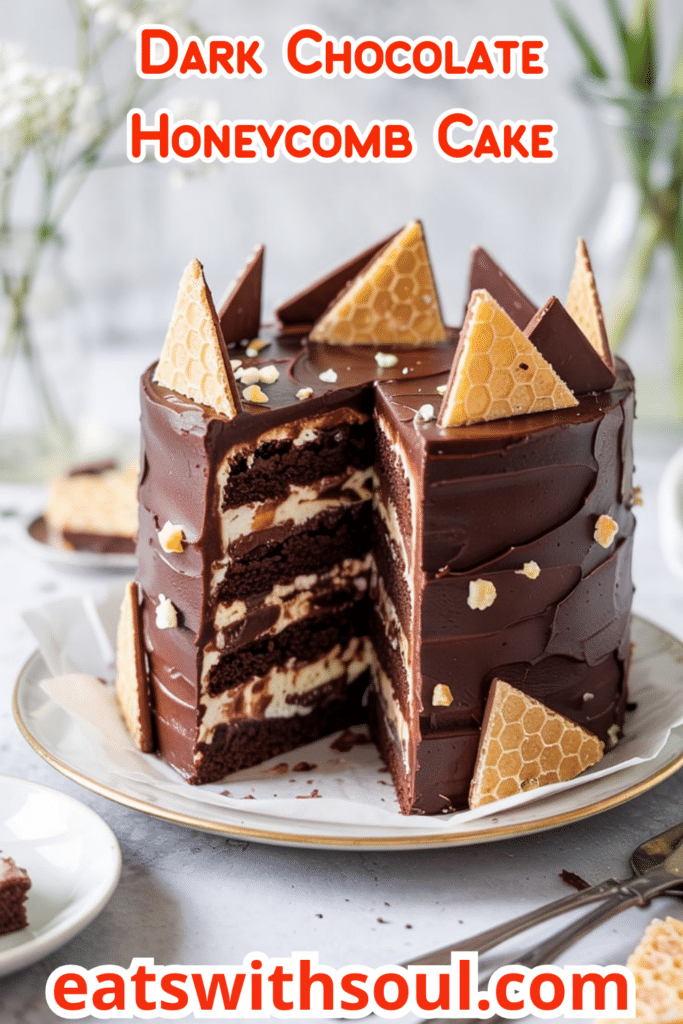
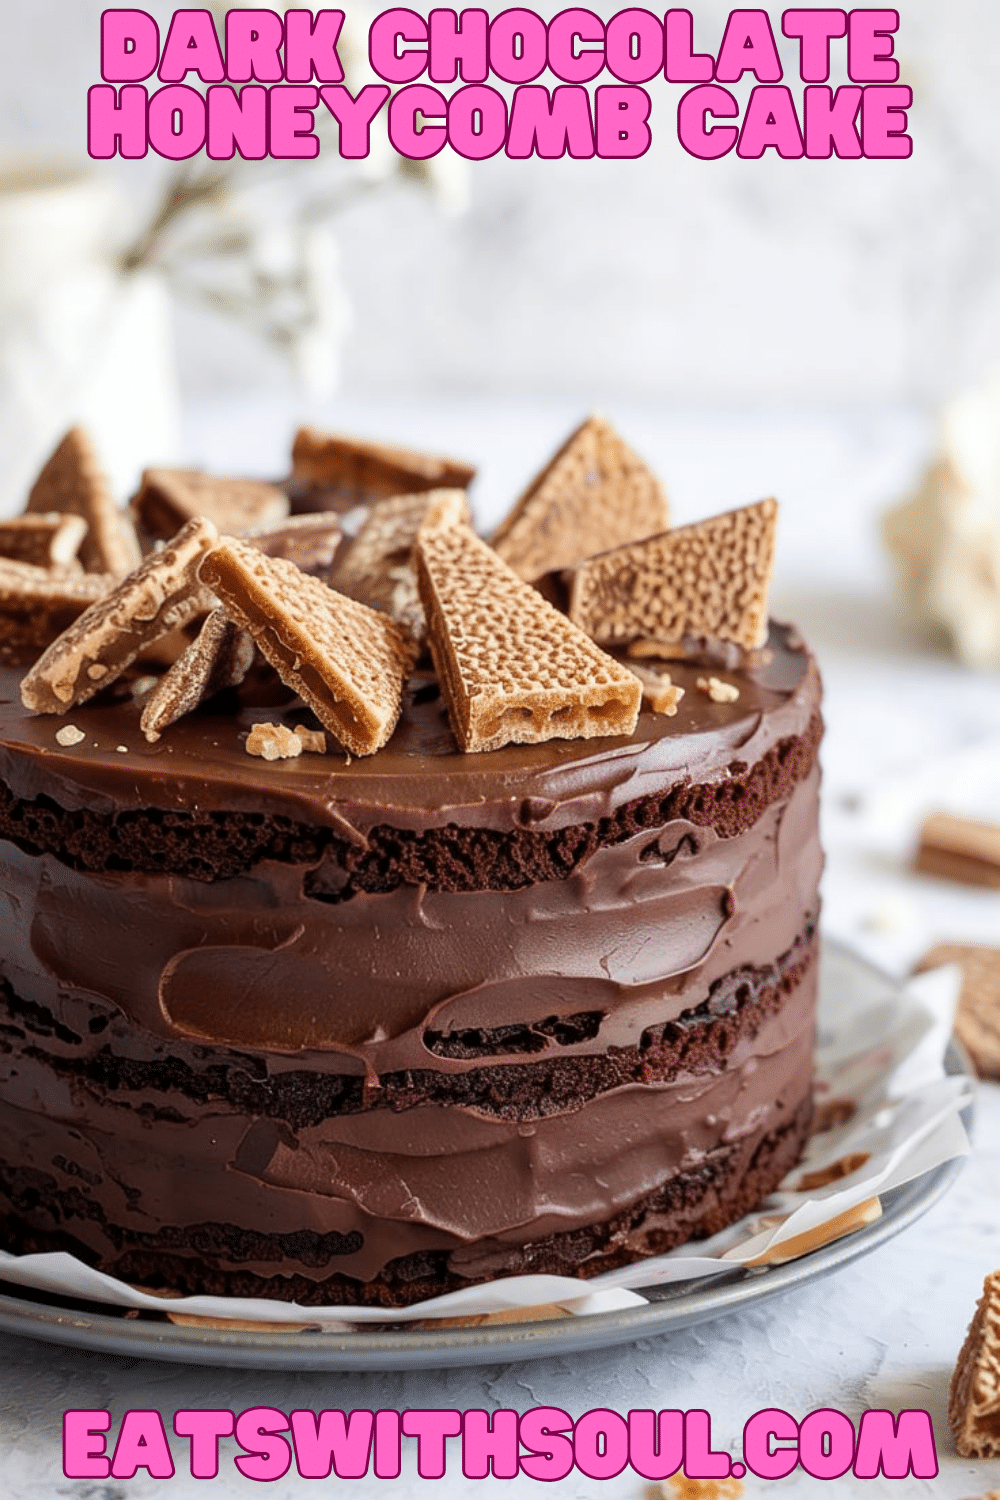
This Dark Chocolate Honeycomb Cake is a true showstopper, a dessert that masterfully combines deep chocolate flavor with the unique, airy crunch of homemade honeycomb candy. Layers of moist, dark chocolate cake are sandwiched with a rich fudge frosting and studded with crushed honeycomb, then adorned with dramatic shards of the golden, bubbly candy.
My inspiration for this recipe comes from the fascinating texture and flavor of honeycomb candy (also known as sponge candy or cinder toffee) and the desire to pair it with an equally intense dark chocolate cake. I wanted to create a dessert that was visually striking, texturally exciting, and deeply satisfying for chocolate lovers.
This cake is perfect for sophisticated celebrations, birthdays, or any occasion where you want to present a truly impressive and unique dessert. It involves making candy, which is a fun skill to learn, and the results are spectacular. It is a decadent dessert.
Nostalgic Appeal
Rich, dark chocolate cake holds a timeless appeal, often associated with indulgent moments and special celebrations. Honeycomb candy, while perhaps less common today, has a nostalgic charm for those who remember its unique, bubbly crunch from childhood sweets or seaside towns.
This cake brings together the classic comfort of chocolate cake with the playful, slightly retro magic of honeycomb. The contrast between the moist cake, smooth frosting, and shattering candy creates a delightful experience that feels both familiar and novel.
It’s a dessert that sparks conversation and delight, offering a unique twist on traditional layer cakes. A perfect dessert, to create new memories.
Homemade Focus
This Dark Chocolate Honeycomb Cake is a celebration of ambitious homemade baking. Every element is crafted from scratch: the moist dark chocolate cake, the fascinating honeycomb candy (which involves working with hot sugar), and the rich, dark chocolate fudge frosting.
Making the honeycomb candy at home is a particularly rewarding part of this recipe. Watching the sugar syrup transform into a light, airy, golden mass is kitchen magic! Crafting the cake and frosting from scratch ensures the highest quality and deepest flavor.
This recipe highlights the satisfaction of mastering different baking and candy-making techniques to create a truly integrated and impressive dessert. The homemade effort shines through in every bite. A rewarding cake to bake.
Flavor Goal
The primary flavor goal is an intense, sophisticated dark chocolate experience, punctuated by the sweet, slightly caramelized, and airy notes of the honeycomb. The chocolate cake, enriched with cocoa and buttermilk, should be deeply flavorful and exceptionally moist.
The honeycomb provides bursts of sweetness and a unique, brittle, melt-in-your-mouth texture. The chocolate fudge frosting, potentially enhanced with black cocoa, should be rich, intensely chocolatey, smooth, and not overly sweet, complementing both the cake and the candy.
The overall experience should be a symphony of dark chocolate, accented by sweet crunch and smooth creaminess. It’s about balancing richness with textural contrast for a truly memorable dessert. The perfect balance between texture and flavour.
Ingredient Insights
For the Chocolate Cake:
- All-Purpose Flour: Provides structure.
- Granulated Sugar: Sweetens the cake.
- Cocoa Powder (Regular or Dutch-processed): Delivers the primary chocolate flavor. Dutch-processed will yield a darker color and smoother flavor.
- Baking Soda & Baking Powder: Leavening agents. Baking soda reacts with the acidic buttermilk.
- Salt: Enhances chocolate flavor and balances sweetness.
- Large Eggs: Provide structure, richness, and binding. Room temperature preferred.
- Vegetable Oil: Guarantees a moist crumb.
- Buttermilk: Adds moisture, tanginess, and activates baking soda for tenderness. Room temperature preferred.
- Vanilla Extract: Rounds out the flavors.
- Very Hot Water: Blooms the cocoa powder for intense flavor and creates a thin batter for a moist cake.
For the Honeycomb:
- Granulated Sugar: The main component, caramelized to create the candy.
- Light Corn Syrup: Helps prevent sugar crystallization, ensuring a smooth candy.
- Water: Dissolves the sugar initially.
- Baking Soda (Sifted): The magic ingredient! Reacts with the hot sugar syrup to create the iconic bubbly, airy texture. Sifting prevents clumps. Handle hot sugar syrup with extreme caution.
For the Chocolate Fudge Frosting:
- Unsalted Butter (Room Temperature): The base of the frosting, providing richness. Must be properly softened.
- Good Quality Dark Chocolate (Chopped, Melted, Cooled): Adds intense chocolate flavor and fudgy texture. Ensure it’s cooled slightly so it doesn’t melt the butter.
- Powdered Sugar (Sifted): Provides sweetness and structure. Sifting prevents lumps.
- Regular Cocoa Powder (Sifted): Adds deep chocolate flavor.
- Black Cocoa (Optional): Primarily used for achieving a very deep, almost black color. It has a strong, unique flavor. Use sparingly if unfamiliar.
- Heavy Cream: Adjusts the frosting consistency to make it smooth and spreadable.
Essential Equipment
- Stand Mixer (Highly Recommended): For cake batter and especially for the frosting.
- Three 6-Inch Round Cake Pans: For baking the layers. Note the smaller size.
- Parchment Paper: Essential for lining cake pans and the honeycomb pan.
- Cocoa Powder: For dusting the cake pans.
- Medium Bowl: For cake wet ingredients.
- Large Saucepan (Heavy-Bottomed): For making the honeycomb candy. Needs to be large enough to accommodate foaming.
- Candy Thermometer: Crucial for accurately making the honeycomb candy.
- Silicone Baking Mat or Greased Tin Foil: Essential for lining the pan for the honeycomb. Silicone is ideal.
- Pastry Brush: For washing down saucepan sides when making candy.
- Whisk: For whisking baking soda into honeycomb syrup briefly.
- Knife: For breaking the cooled honeycomb.
- Wire Racks: For cooling cake layers.
- Offset Spatula or Bench Scraper: For frosting the cake.
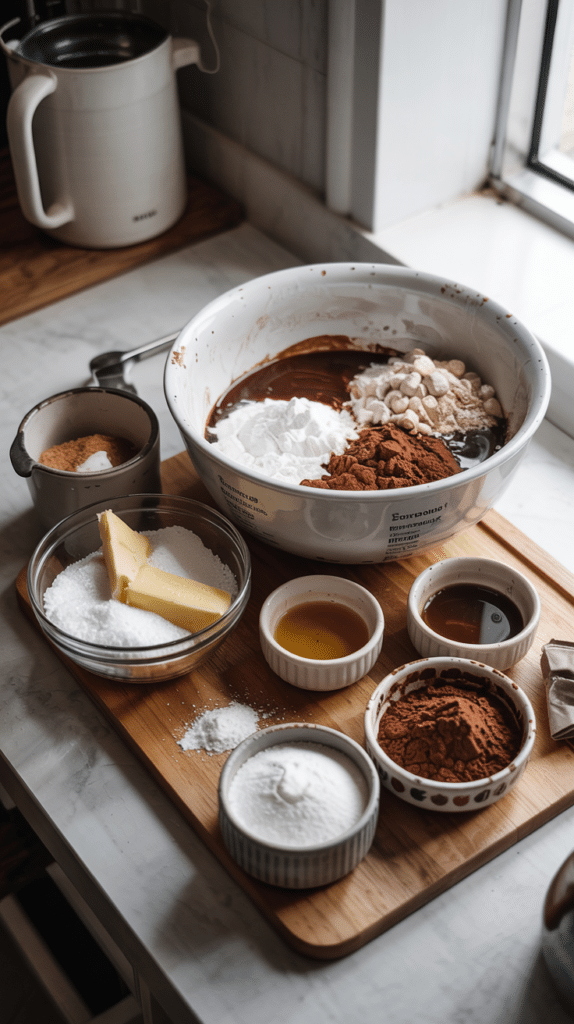
Ingredients
For the Chocolate Cake:
- 1 ½ cups all-purpose flour
- 1 ½ cups granulated sugar
- ¾ cup cocoa powder (regular or Dutch-processed)
- 1 ½ teaspoons baking soda
- 1 teaspoon baking powder
- 1 teaspoon salt
- 2 large eggs
- ¼ cup vegetable oil
- ¾ cup buttermilk
- 2 teaspoons vanilla extract
- ¾ cup very hot water
For the Honeycomb:
- 2 cups granulated sugar
- ½ cup light corn syrup
- 1/3 cup water
- 1 tablespoon baking soda (sifted)
For the Chocolate Fudge Frosting:
- 1 ½ cups unsalted butter (room temperature)
- 3 ounces good quality dark chocolate (chopped, melted, and cooled)
- 3 cups powdered sugar (sifted)
- 1 cup regular cocoa powder (sifted)
- 3 tablespoons black cocoa (optional – for color)
- 1–3 tablespoon heavy cream

Step-by-Step Instructions
1. Make the Chocolate Cake Layers:
- Preheat oven to 350°F (175°C). Grease three 6-inch round cake pans. Dust the insides with cocoa powder (tapping out excess). Line the bottoms with parchment paper circles.
- In the bowl of a stand mixer fitted with the paddle attachment, combine the flour, sugar, cocoa powder(s), baking soda, baking powder, and salt. Mix on low speed until well combined.
- In a separate medium bowl, whisk together the eggs, oil, buttermilk, and vanilla extract.
- With the mixer on low, slowly pour the very hot water into the wet ingredients while whisking constantly (this tempers the eggs slightly).
- Add the combined wet ingredients (including the hot water mixture) to the dry ingredients in the mixer bowl. Mix on medium speed for 2-3 minutes until the batter is smooth. Scrape down the bowl as needed. Batter will be very thin.
- Pour the batter evenly into the three prepared pans.
- Bake for approximately 30-35 minutes, or until a toothpick inserted into the center comes out mostly clean (a few moist crumbs are okay).
- Place the cakes on a wire rack to cool in the pans for 10 minutes.
- Carefully invert the cakes onto the wire rack, remove the parchment paper, and let them cool completely.
2. Make the Honeycomb Candy:
- Prepare Pan: Line a quarter sheet pan (9” x 13”) with a silicone baking mat OR line it with foil and grease the foil well with cooking spray. Have your sifted baking soda ready near the stove.
- Cook Sugar Syrup: Place the sugar, corn syrup, and water into a large, heavy-bottomed saucepan. Stir well only until the sugar is dissolved. Do not stir after this point.
- Wash Down Sides: Use a pastry brush dipped in water to wash down any sugar crystals from the sides of the pot.
- Boil to Hard Crack: Bring the mixture to a boil over high heat. Clip on a candy thermometer. Cook, without stirring, until the temperature reaches 300°F (149°C – Hard Crack Stage). This will take about 10 minutes. Watch carefully as the temperature rises quickly near the end.
- Add Baking Soda: Immediately remove the saucepan from the heat. Sprinkle the sifted baking soda evenly over the top of the hot syrup. Quickly and briefly whisk it in – just enough to incorporate (MAX 5 seconds). The mixture will foam up dramatically and turn golden. Do not over-whisk, or it will deflate.
- Pour and Cool: Immediately pour the foaming mixture into the prepared lined pan. Do not spread it. Allow it to cool completely and harden at room temperature (1-2 hours). Do not refrigerate.
3. Prepare Honeycomb for Cake:
- Once the honeycomb is completely cool and hard, carefully lift it from the pan (using the mat or foil).
- Use the tip of a knife or gently break it with your hands into large, decorative shards for the top of the cake. Set these aside.
- Chop up some of the remaining honeycomb into small, pea-sized pieces to be used between the cake layers.
- Store all honeycomb pieces immediately in an airtight container, separated by parchment paper if layering, at room temperature. Honeycomb absorbs moisture quickly and will become sticky if exposed to air.
4. Make the Chocolate Frosting:
- In a medium bowl, whisk the sifted powdered sugar and sifted cocoa powder(s) together to combine.
- In the bowl of a stand mixer fitted with the paddle attachment, beat the room temperature butter on medium-high speed until smooth and creamy, about 1 minute.
- Reduce speed to low. Add the sugar/cocoa mixture about 1 cup at a time, mixing until just combined after each addition. Scrape down the bowl.
- Beat in the melted and slightly cooled dark chocolate until combined.
- Add 1 tablespoon of heavy cream and beat until combined. Add more cream, 1 tablespoon at a time, only if needed to reach a smooth, spreadable consistency.
- Increase speed to medium-high and beat for approximately 5 minutes until the frosting is very smooth and fluffy.
5. Assemble the Cake:
- If necessary, level the tops of the cooled cake layers. Place one layer onto your cake stand or serving plate.
- Top with approximately 2/3 cup of the chocolate frosting and spread evenly.
- Sprinkle some of the crushed (small pieces) honeycomb evenly over the frosting.
- Place the second cake layer on top, spread with another 2/3 cup frosting, and sprinkle with more crushed honeycomb.
- Place the third cake layer on top.
- Apply a thin “crumb coat” of frosting over the entire cake. Refrigerate for 30 minutes to set the crumbs.
6. Frost and Decorate:
- Frost the top and sides of the chilled cake smoothly or with a rustic pattern using the remaining frosting.
- Carefully arrange the large honeycomb shards decoratively along the top edge or center of the cake just before serving (honeycomb can get sticky if placed on the cake too far in advance).

Troubleshooting
- Cake Dry/Dense: Overbaking, inaccurate measurements, or overmixing. Use an oven thermometer, weigh ingredients if possible, mix batter minimally.
- Honeycomb Sticky/Chewy: Didn’t reach 300°F, absorbed moisture from the air (store airtight immediately!), or was refrigerated.
- Honeycomb Deflated: Over-whisked after adding baking soda, or baking soda was old/clumpy (sift!).
- Honeycomb Burnt: Sugar syrup cooked past 300°F or cooked too quickly on too high heat.
- Frosting Grainy: Sugars/cocoa not sifted, or not beaten long enough. Ensure butter is room temp and beat thoroughly.
- Frosting Too Stiff/Soft: Adjust with tiny amounts of cream (if stiff) or powdered sugar (if soft), or chill briefly if butter was too warm.
Tips and Variations
- Honeycomb Safety: Hot sugar syrup is extremely dangerous. Work carefully, have everything ready in advance, and keep children/pets away.
- Honeycomb Storage: Absolutely crucial to store honeycomb in a completely airtight container at room temperature immediately after breaking. It will get sticky very quickly otherwise.
- Black Cocoa: Use sparingly for color; it has a strong flavor. Start with less if unsure.
- Coffee: Replace the hot water in the cake recipe with hot brewed coffee for deeper flavor.
- Frosting Texture: If you prefer a lighter frosting, beat it longer. For denser, beat less.
- Simplified Decoration: Skip the large shards and just use the crushed honeycomb between layers and sprinkled on top/sides.
Serving and Pairing Suggestions
- Serve at Room Temperature: Allows the cake and frosting to be at their best texture.
- Decorate Just Before Serving: Add honeycomb shards just before serving to maintain their crispness.
- With Coffee or Espresso: Cuts through the richness beautifully.
- With Milk: A classic pairing.
- Small Slices: This cake is very rich and intense.
Nutritional Information
(Note: Highly estimated, per slice, assuming 12 slices from a 3-layer 6-inch cake. Honeycomb adds significant sugar.)
- Calories: 650-850+ (Very decadent!)
- Fat: 35-50g+
- Saturated Fat: 20-30g+
- Cholesterol: 100-140mg+
- Sodium: 250-350mg+
- Total Carbohydrates: 80-100g+
- Dietary Fiber: 5-8g+
- Sugars: 60-80g+
- Protein: 7-9g+
Decadent Dark Chocolate Honeycomb Cake: A Symphony of Textures
Discover how to bake a stunning Dark Chocolate Honeycomb Cake! Features moist chocolate cake, homemade crunchy honeycomb candy, and a rich dark chocolate fudge frosting.
Ingredients
For the Chocolate Cake:
- 1 ½ cups all-purpose flour
- 1 ½ cups granulated sugar
- ¾ cup cocoa powder (regular or Dutch-processed)
- 1 ½ teaspoons baking soda
- 1 teaspoon baking powder
- 1 teaspoon salt
- 2 large eggs
- ¼ cup vegetable oil
- ¾ cup buttermilk
- 2 teaspoons vanilla extract
- ¾ cup very hot water
For the Honeycomb:
- 2 cups granulated sugar
- ½ cup light corn syrup
- 1/3 cup water
- 1 tablespoon baking soda (sifted)
For the Chocolate Fudge Frosting:
- 1 ½ cups unsalted butter (room temperature)
- 3 ounces good quality dark chocolate (chopped, melted, and cooled)
- 3 cups powdered sugar (sifted)
- 1 cup regular cocoa powder (sifted)
- 3 tablespoons black cocoa (optional – for color)
- 1–3 tablespoon heavy cream
Instructions
1. Make the Chocolate Cake Layers:
- Preheat oven to 350°F (175°C). Grease three 6-inch round cake pans. Dust the insides with cocoa powder (tapping out excess). Line the bottoms with parchment paper circles.
- In the bowl of a stand mixer fitted with the paddle attachment, combine the flour, sugar, cocoa powder(s), baking soda, baking powder, and salt. Mix on low speed until well combined.
- In a separate medium bowl, whisk together the eggs, oil, buttermilk, and vanilla extract.
- With the mixer on low, slowly pour the very hot water into the wet ingredients while whisking constantly (this tempers the eggs slightly).
- Add the combined wet ingredients (including the hot water mixture) to the dry ingredients in the mixer bowl. Mix on medium speed for 2-3 minutes until the batter is smooth. Scrape down the bowl as needed. Batter will be very thin.
- Pour the batter evenly into the three prepared pans.
- Bake for approximately 30-35 minutes, or until a toothpick inserted into the center comes out mostly clean (a few moist crumbs are okay).
- Place the cakes on a wire rack to cool in the pans for 10 minutes.
- Carefully invert the cakes onto the wire rack, remove the parchment paper, and let them cool completely.
2. Make the Honeycomb Candy:
- Prepare Pan: Line a quarter sheet pan (9” x 13”) with a silicone baking mat OR line it with foil and grease the foil well with cooking spray. Have your sifted baking soda ready near the stove.
- Cook Sugar Syrup: Place the sugar, corn syrup, and water into a large, heavy-bottomed saucepan. Stir well only until the sugar is dissolved. Do not stir after this point.
- Wash Down Sides: Use a pastry brush dipped in water to wash down any sugar crystals from the sides of the pot.
- Boil to Hard Crack: Bring the mixture to a boil over high heat. Clip on a candy thermometer. Cook, without stirring, until the temperature reaches 300°F (149°C – Hard Crack Stage). This will take about 10 minutes. Watch carefully as the temperature rises quickly near the end.
- Add Baking Soda: Immediately remove the saucepan from the heat. Sprinkle the sifted baking soda evenly over the top of the hot syrup. Quickly and briefly whisk it in – just enough to incorporate (MAX 5 seconds). The mixture will foam up dramatically and turn golden. Do not over-whisk, or it will deflate.
- Pour and Cool: Immediately pour the foaming mixture into the prepared lined pan. Do not spread it. Allow it to cool completely and harden at room temperature (1-2 hours). Do not refrigerate.
3. Prepare Honeycomb for Cake:
- Once the honeycomb is completely cool and hard, carefully lift it from the pan (using the mat or foil).
- Use the tip of a knife or gently break it with your hands into large, decorative shards for the top of the cake. Set these aside.
- Chop up some of the remaining honeycomb into small, pea-sized pieces to be used between the cake layers.
- Store all honeycomb pieces immediately in an airtight container, separated by parchment paper if layering, at room temperature. Honeycomb absorbs moisture quickly and will become sticky if exposed to air.
4. Make the Chocolate Frosting:
- In a medium bowl, whisk the sifted powdered sugar and sifted cocoa powder(s) together to combine.
- In the bowl of a stand mixer fitted with the paddle attachment, beat the room temperature butter on medium-high speed until smooth and creamy, about 1 minute.
- Reduce speed to low. Add the sugar/cocoa mixture about 1 cup at a time, mixing until just combined after each addition. Scrape down the bowl.
- Beat in the melted and slightly cooled dark chocolate until combined.
- Add 1 tablespoon of heavy cream and beat until combined. Add more cream, 1 tablespoon at a time, only if needed to reach a smooth, spreadable consistency.
- Increase speed to medium-high and beat for approximately 5 minutes until the frosting is very smooth and fluffy.
5. Assemble the Cake:
- If necessary, level the tops of the cooled cake layers. Place one layer onto your cake stand or serving plate.
- Top with approximately 2/3 cup of the chocolate frosting and spread evenly.
- Sprinkle some of the crushed (small pieces) honeycomb evenly over the frosting.
- Place the second cake layer on top, spread with another 2/3 cup frosting, and sprinkle with more crushed honeycomb.
- Place the third cake layer on top.
- Apply a thin “crumb coat” of frosting over the entire cake. Refrigerate for 30 minutes to set the crumbs.
6. Frost and Decorate:
- Frost the top and sides of the chilled cake smoothly or with a rustic pattern using the remaining frosting.
- Carefully arrange the large honeycomb shards decoratively along the top edge or center of the cake just before serving (honeycomb can get sticky if placed on the cake too far in advance).
Recipe Summary and Q&A
Summary: This Dark Chocolate Honeycomb Cake features moist dark chocolate layers, homemade honeycomb candy (used crushed in the filling and as shards for decoration), and a rich dark chocolate fudge frosting. The process involves baking the cake, carefully cooking sugar syrup to make honeycomb, cooling and breaking the candy, making the frosting, and assembling the layered cake.
Q&A:
- Q: Is making honeycomb difficult?
- A: It requires precision with temperature (a candy thermometer is essential) and quick, careful work when adding the baking soda. Read the instructions thoroughly first. It’s manageable but needs focus and caution with hot sugar.
- Q: My honeycomb got sticky after a day. Why?
- A: Honeycomb is highly hygroscopic (it absorbs moisture from the air). It must be stored in a completely airtight container immediately after cooling and breaking, ideally with silica gel packets if you live in a humid area.
- Q: Can I make components ahead of time?
- A: Yes. Cake layers can be baked, cooled, wrapped, and stored at room temp (1 day) or frozen. Honeycomb can be made days ahead if stored absolutely airtight. Frosting can be made a day or two ahead, refrigerated, then brought to room temp and re-whipped. Assemble closer to serving time, especially adding the decorative shards.
- Q: What if I don’t have black cocoa?
- A: Just omit it. It’s primarily for achieving a super dark color; the cake will still be delicious and deeply chocolatey without it.

