Introduction & Inspiration
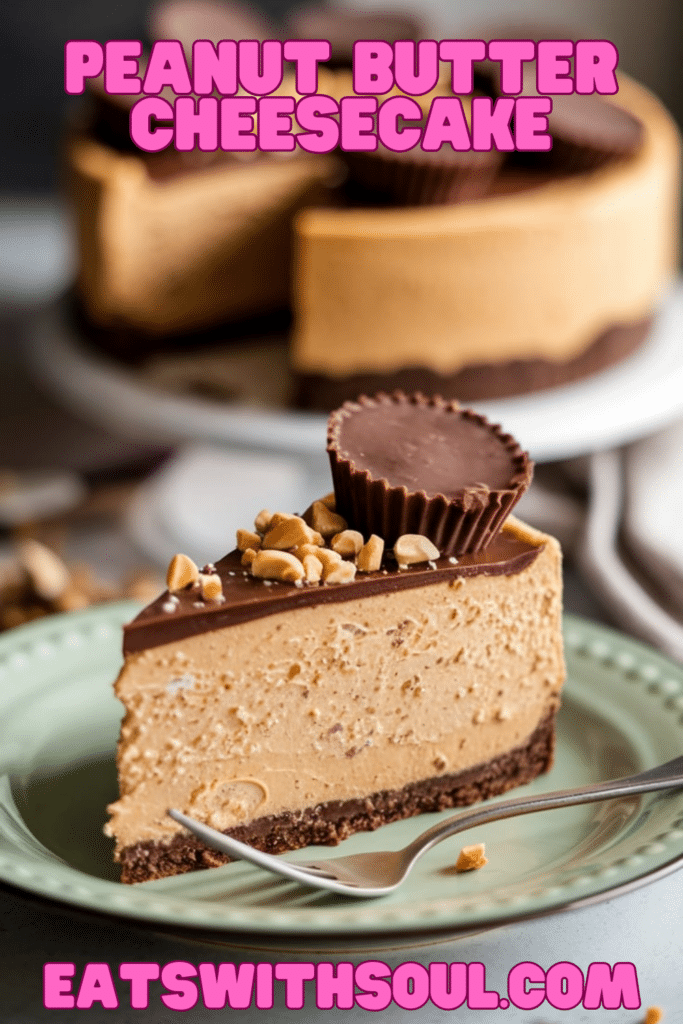
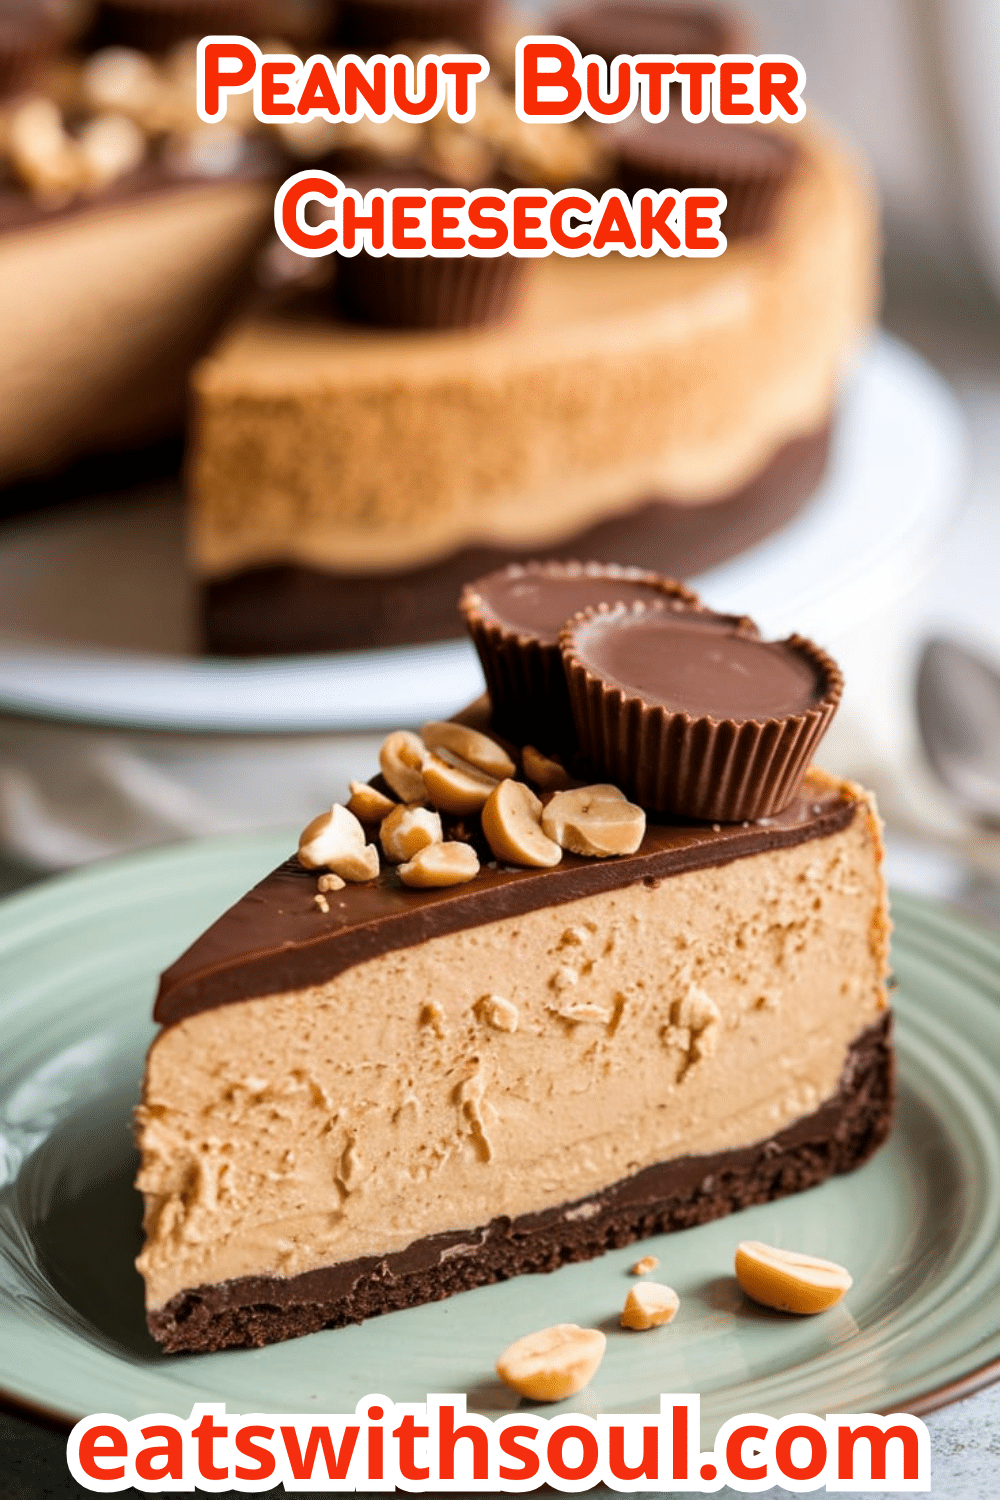
Peanut butter and chocolate – it’s a classic combination that’s hard to resist. This Peanut Butter Cheesecake takes that beloved pairing to a whole new level, combining a creamy, rich peanut butter cheesecake filling with a chocolate wafer crust and a decadent chocolate ganache topping.
My inspiration for this recipe comes from a love of both cheesecake and peanut butter cups. I wanted to create a dessert that captured the essence of those flavors in a sophisticated and satisfying way. It is a showstopping dessert.
This cheesecake is perfect for special occasions, birthdays, or any time you want to indulge in a truly decadent treat. It’s a guaranteed crowd-pleaser that will impress even the most discerning dessert lovers. It is a rich dessert.
Perfect to impress, this is a delightful dessert.
Nostalgic Appeal
Peanut butter and chocolate is a flavor combination that evokes feelings of childhood nostalgia for many. It’s a reminder of favorite candies, after-school snacks, and simple pleasures.
This cheesecake takes that familiar pairing and elevates it to a new level of sophistication. The creamy, rich filling, the crunchy crust, and the decadent ganache create a dessert that’s both comforting and elegant.
This recipe is about taking a beloved classic and transforming it into something truly special. It’s a way to indulge in those nostalgic flavors while creating a dessert that’s worthy of any occasion.
This is also a dessert, that many generation will enjoy.
Homemade Focus
As always, I’m a firm believer in the power of homemade. While store-bought cheesecakes might offer convenience, they simply can’t compare to the flavor and texture of a cheesecake made from scratch.
Every element of this Peanut Butter Cheesecake, from the chocolate wafer crust to the creamy peanut butter filling and the rich chocolate ganache, is made with care and attention to detail.
Making a cheesecake from scratch allows you to control the quality of the ingredients and ensure that every component is perfectly balanced. It’s a labor of love, but the results are undeniably worth it.
This recipe is a little bit more challenging. But the result worth it.
Flavor Goal
The primary flavor goal for this Peanut Butter Cheesecake is a harmonious blend of rich peanut butter, creamy cheesecake, and decadent chocolate. The filling should be smooth and creamy, with a pronounced peanut butter flavor that’s balanced by the sweetness of the sugar and the tanginess of the cream cheese.
The chocolate wafer crust provides a contrasting texture and a subtle chocolate flavor that complements the filling. The chocolate ganache topping adds another layer of richness and intensifies the chocolate experience.
The overall effect is a cheesecake that’s both decadent and satisfying, a perfect balance of flavors and textures. It’s a dessert that’s sure to impress and delight. Every bite is a pleasure.
Ingredient Insights
For the Crust:
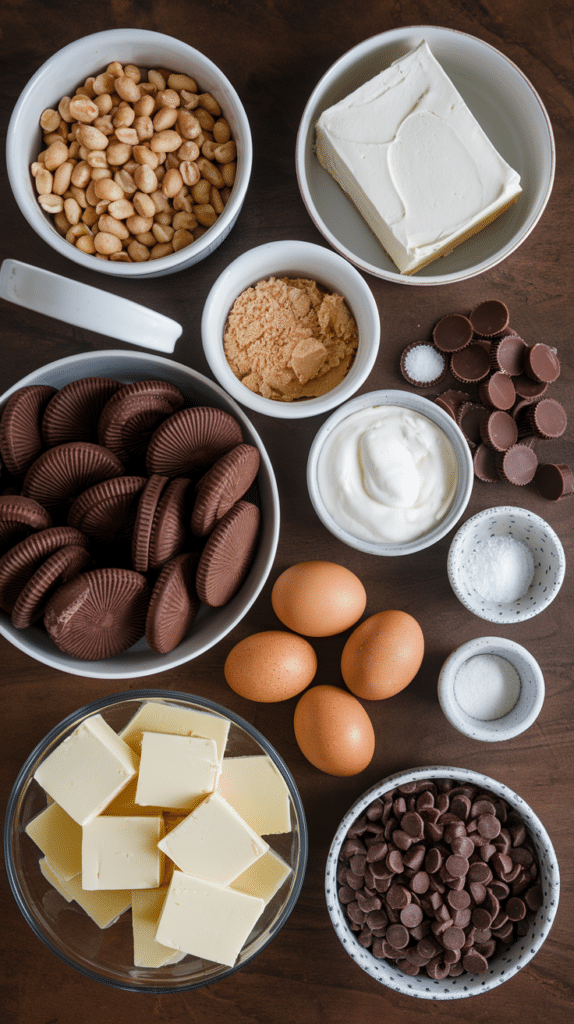
- Chocolate Wafer Cookies: Provide the base for the crust, adding a subtle chocolate flavor and a satisfying crunch.
- Cocktail Peanuts: Add a salty, nutty element that complements the peanut butter filling.
- Light Brown Sugar: Adds sweetness and a hint of molasses flavor to the crust.
- Unsalted Butter (Melted): Binds the crust ingredients together and adds richness.
For the Filling:
- Cream Cheese (Room Temperature): The base of the cheesecake filling, providing its signature creamy texture and tangy flavor. Use full-fat cream cheese for the best results.
- Sour Cream (Room Temperature): Adds extra creaminess and tanginess to the filling.
- Creamy Peanut Butter: The star of the show! Use a good-quality creamy peanut butter for the best flavor and texture.
- Granulated Sugar: Sweetens the filling and contributes to its smooth texture.
- Salt: Enhances the other flavors and balances the sweetness.
- Large Eggs (Room Temperature): Bind the filling together and add richness.
- Heavy Whipping Cream: Adds extra creaminess and helps to create a light and airy texture.
For the Chocolate Topping:
- Semi-Sweet Chocolate Chips: Provide the rich chocolate flavor for the ganache.
- Heavy Whipping Cream: Creates a smooth, pourable ganache when combined with the melted chocolate.
For Garnish (Optional):
- Cocktail Peanuts: Add a salty crunch and visual appeal.
- Chopped Peanut Butter Cups: Enhance the peanut butter flavor and add a fun, decorative touch.
- Flaked Salt: A sprinkle of flaked salt enhances the chocolate flavor and adds a subtle salty contrast.
Essential Equipment
- 9-Inch Springform Pan: Essential for making a cheesecake. The removable sides make it easy to release the finished cheesecake without damaging it.
- Foil: For wrapping the bottom and sides of the springform pan to prevent leaks during the water bath.
- Food Processor: For crushing the cookies and chopping the peanuts for the crust. You can also crush the cookies by hand in a resealable plastic bag.
- Roasting Pan: For creating a water bath for the cheesecake.
- Stand Mixer (or Hand Mixer): For making the cheesecake filling.
- Small Heat-Proof Bowl: For making the chocolate ganache.
- Offset Spatula
Ingredients
For the crust:
- 1/2 cup cocktail peanuts
- 30 chocolate wafer cookies
- 2 Tbsp. light brown sugar
- 4 Tbsp. unsalted butter, melted
For the filling:
- 4 8 oz. blocks cream cheese, at room temperature
- 1/2 cup sour cream, at room temperature
- 1 cup creamy peanut butter
- 1 cup granulated sugar
- 1/4 tsp. salt
- 4 large eggs, at room temperature
- 2/3 cup heavy whipping cream
For the chocolate topping:
- 1/2 cup semi-sweet chocolate chips
- 1/3 cup heavy whipping cream
- Cocktail peanuts, chopped peanut butter cups and flaked salt, to garnish (optional)

Step-by-Step Instructions
1. Prepare the Crust:
- Preheat the oven to 350°F (175°C).
- Tightly wrap the bottom and up the sides of a 9-inch springform pan with foil.
- Place the peanuts in the bowl of a food processor. Pulse until roughly chopped.
- Add the wafer cookies and light brown sugar. Pulse until very finely ground.
- Add the melted butter and pulse until the mixture resembles wet sand.
- Transfer the mixture to the springform pan.
- Using the bottom of a glass, press the crust mixture firmly into the bottom and about 1 inch up the sides of the pan.
- Place the springform pan inside of a roasting pan.
- Bake for 10 minutes.
- Remove and let cool while making the filling.
2. Reduce Oven Temperature:
- Reduce the oven temperature to 325°F (160°C).
3. Make the Filling:
- In the bowl of a stand mixer fitted with the paddle attachment (or using a hand mixer), beat the room temperature cream cheese and room temperature sour cream on medium-low speed until totally smooth, about 3 minutes.
- Add the peanut butter, sugar, and salt. Beat on medium-low speed until completely combined.
- With the mixer running, add the eggs one at a time, beating until each is fully incorporated. Scrape down the sides of the bowl in between eggs.
- Mix in the heavy whipping cream until combined.
- Pour the batter into the cooled crust. (The batter will almost fill the pan.)
- Gently tap or jiggle the pan to level the batter.
4. Prepare the Water Bath:
- Boil 8 cups of water.
- Place the roasting pan with the cheesecake in the oven.
- Very carefully pour the boiling water into the roasting pan until it reaches about 1 inch deep.
5. Bake the Cheesecake:
- Bake for 75 to 80 minutes, or until the filling is puffed and the center slightly wobbles when the pan is gently shaken. Add more hot water to the pan during baking if needed.
6. Cool in Oven:
- Turn off the oven, crack the door a few inches, and let the cheesecake cool in the oven for 1 hour. This slow cooling process helps to prevent cracking.
7. Cool Completely:
- Remove the cheesecake from the oven and finish cooling to room temperature.
- Remove the cheesecake from the water bath and remove the foil from the pan.
8. Chill:
- Chill the cooled cheesecake for at least 6 hours, or preferably overnight.
9. Release from Pan:
- When ready to serve, run a thin knife or offset spatula around the sides of the cheesecake to release it from the pan.
- Release and remove the side of the springform pan.
- Transfer the cheesecake to a serving plate.
10. Make the Chocolate Topping:
- Place the chocolate chips in a small heat-proof bowl.
- Microwave the heavy whipping cream until very hot and just starting to bubble, about 1 minute.
- Pour the hot cream over the chocolate chips and let stand for 10 minutes.
- Stir until the chocolate is fully melted and the ganache is smooth.
11. Top and Garnish:
- Pour the ganache over the top of the chilled cheesecake.
- Spread to the edges to let it drip down the sides.
- Garnish with chopped peanuts, chopped peanut butter cups, and flaked salt, if desired.
12. Refrigerate and Serve:
- Refrigerate until ready to serve.

Troubleshooting
- Cheesecake Cracked: Cracking can occur due to rapid temperature changes or overbaking. Make sure to use a water bath, cool the cheesecake slowly in the oven, and don’t overbake.
- Filling is Too Soft: This could be due to underbaking. Make sure to bake the cheesecake until the center is just set and slightly wobbly.
- Crust is Soggy: Make sure to bake the crust long enough before adding the filling.
- Cheesecake is watery: The water bath might have leak. Be sure to use enough foil.
Tips and Variations
- Use Room Temperature Ingredients: Using room temperature cream cheese, sour cream, and eggs is crucial for a smooth, lump-free filling.
- Don’t Overmix: Overmixing the batter can incorporate too much air, which can lead to cracking.
- Water Bath is Essential: A water bath helps to cook the cheesecake gently and evenly, preventing cracking and ensuring a creamy texture.
- Chill Thoroughly: Chilling the cheesecake for at least 6 hours, or preferably overnight, allows the filling to set completely and the flavors to meld.
- Add a Swirl: Swirl some melted peanut butter or chocolate into the filling before baking.
- Use Different Cookies: Try using Oreo cookies or Nutter Butter cookies for the crust.
Serving and Pairing Suggestions
- Serve Chilled: This cheesecake is best served chilled.
- With a Glass of Milk: A classic pairing!
- With Coffee or Dessert Wine: The richness of the cheesecake pairs well with a strong cup of coffee or a sweet dessert wine.
- With Berries
Nutritional Information
(Note: Estimated, per slice, assuming 12 slices)
- Calories: 550-600
- Fat: 40-45g
- Saturated Fat: 20-25g
- Cholesterol: 150-180mg
- Sodium: 300-350mg
- Total Carbohydrates: 45-50g
- Dietary Fiber: 2-3g
- Sugars: 30-35g
- Protein: 10-12g
Decadent Peanut Butter Cheesecake: A Dream Come True
Learn how to make the ultimate Peanut Butter Cheesecake! This recipe features a chocolate wafer crust, a creamy peanut butter filling, and a rich chocolate ganache topping.
Ingredients
For the crust:
- 1/2 cup cocktail peanuts
- 30 chocolate wafer cookies
- 2 Tbsp. light brown sugar
- 4 Tbsp. unsalted butter, melted
For the filling:
- 4 8 oz. blocks cream cheese, at room temperature
- 1/2 cup sour cream, at room temperature
- 1 cup creamy peanut butter
- 1 cup granulated sugar
- 1/4 tsp. salt
- 4 large eggs, at room temperature
- 2/3 cup heavy whipping cream
For the chocolate topping:
- 1/2 cup semi-sweet chocolate chips
- 1/3 cup heavy whipping cream
- Cocktail peanuts, chopped peanut butter cups and flaked salt, to garnish (optional)
Instructions
1. Prepare the Crust:
- Preheat the oven to 350°F (175°C).
- Tightly wrap the bottom and up the sides of a 9-inch springform pan with foil.
- Place the peanuts in the bowl of a food processor. Pulse until roughly chopped.
- Add the wafer cookies and light brown sugar. Pulse until very finely ground.
- Add the melted butter and pulse until the mixture resembles wet sand.
- Transfer the mixture to the springform pan.
- Using the bottom of a glass, press the crust mixture firmly into the bottom and about 1 inch up the sides of the pan.
- Place the springform pan inside of a roasting pan.
- Bake for 10 minutes.
- Remove and let cool while making the filling.
2. Reduce Oven Temperature:
- Reduce the oven temperature to 325°F (160°C).
3. Make the Filling:
- In the bowl of a stand mixer fitted with the paddle attachment (or using a hand mixer), beat the room temperature cream cheese and room temperature sour cream on medium-low speed until totally smooth, about 3 minutes.
- Add the peanut butter, sugar, and salt. Beat on medium-low speed until completely combined.
- With the mixer running, add the eggs one at a time, beating until each is fully incorporated. Scrape down the sides of the bowl in between eggs.
- Mix in the heavy whipping cream until combined.
- Pour the batter into the cooled crust. (The batter will almost fill the pan.)
- Gently tap or jiggle the pan to level the batter.
4. Prepare the Water Bath:
- Boil 8 cups of water.
- Place the roasting pan with the cheesecake in the oven.
- Very carefully pour the boiling water into the roasting pan until it reaches about 1 inch deep.
5. Bake the Cheesecake:
- Bake for 75 to 80 minutes, or until the filling is puffed and the center slightly wobbles when the pan is gently shaken. Add more hot water to the pan during baking if needed.
6. Cool in Oven:
- Turn off the oven, crack the door a few inches, and let the cheesecake cool in the oven for 1 hour. This slow cooling process helps to prevent cracking.
7. Cool Completely:
- Remove the cheesecake from the oven and finish cooling to room temperature.
- Remove the cheesecake from the water bath and remove the foil from the pan.
8. Chill:
- Chill the cooled cheesecake for at least 6 hours, or preferably overnight.
9. Release from Pan:
- When ready to serve, run a thin knife or offset spatula around the sides of the cheesecake to release it from the pan.
- Release and remove the side of the springform pan.
- Transfer the cheesecake to a serving plate.
10. Make the Chocolate Topping:
- Place the chocolate chips in a small heat-proof bowl.
- Microwave the heavy whipping cream until very hot and just starting to bubble, about 1 minute.
- Pour the hot cream over the chocolate chips and let stand for 10 minutes.
- Stir until the chocolate is fully melted and the ganache is smooth.
11. Top and Garnish:
- Pour the ganache over the top of the chilled cheesecake.
- Spread to the edges to let it drip down the sides.
- Garnish with chopped peanuts, chopped peanut butter cups, and flaked salt, if desired.
12. Refrigerate and Serve:
- Refrigerate until ready to serve.
Recipe Summary and Q&A
Summary: This Peanut Butter Cheesecake recipe combines a chocolate wafer and peanut crust, a creamy peanut butter cheesecake filling, and a rich chocolate ganache topping. The process involves making the crust, baking it briefly, making the filling, baking the cheesecake in a water bath, cooling it slowly, making the ganache, topping the cheesecake, and chilling before serving.
Q&A:
- Q: Can I use store-bought crust?
- A: While homemade is always better, you could. But it is a very important part of the recipe.
- Q: Can I make this cheesecake ahead of time?
- A: Yes! This cheesecake is best made at least a day in advance to allow it to chill thoroughly. It can be stored in the refrigerator for up to 3 days.
- Q: How to store it?
- A: In the refrigerator.
- Q: My ganache is too thick/thin. What do I do?
- A: If the ganache is too thick, add a bit more warm cream, a teaspoon at a time, until it reaches the desired consistency. If it’s too thin, let it cool slightly, and it should thicken up.
- Q: Can I freeze this cheesecake?
- A: Yes, you can freeze this cheesecake. Wrap it tightly in plastic wrap and then foil, and freeze for up to 2 months. Thaw in the refrigerator overnight before serving.
- Q: Can I use natural peanut butter?
- A: It is better to use creamy processed peanut butter.

