Introduction & Inspiration
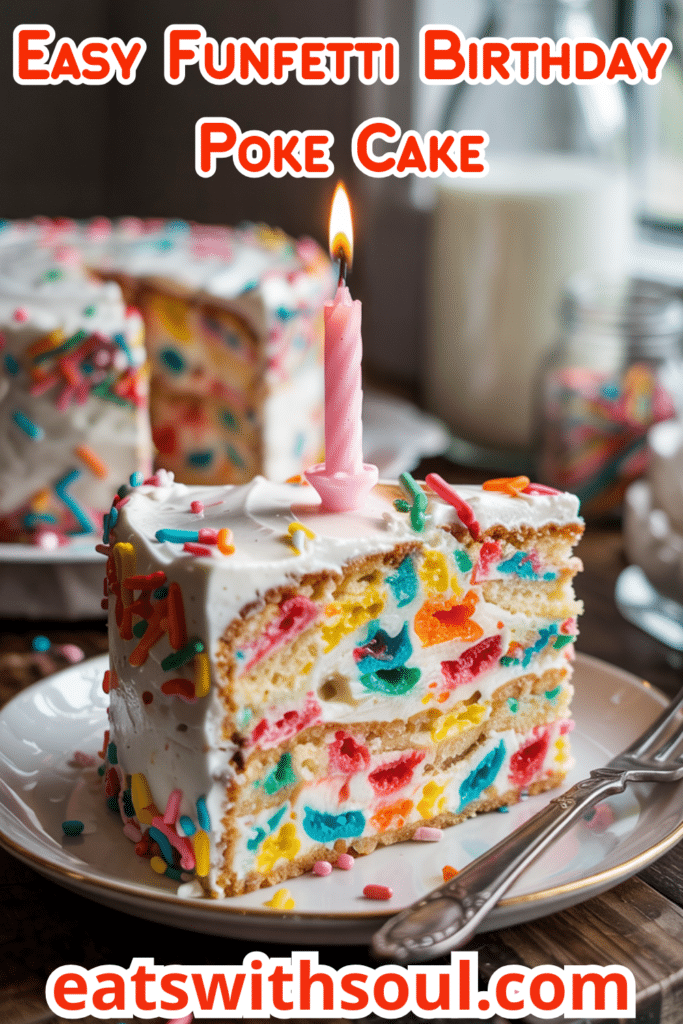
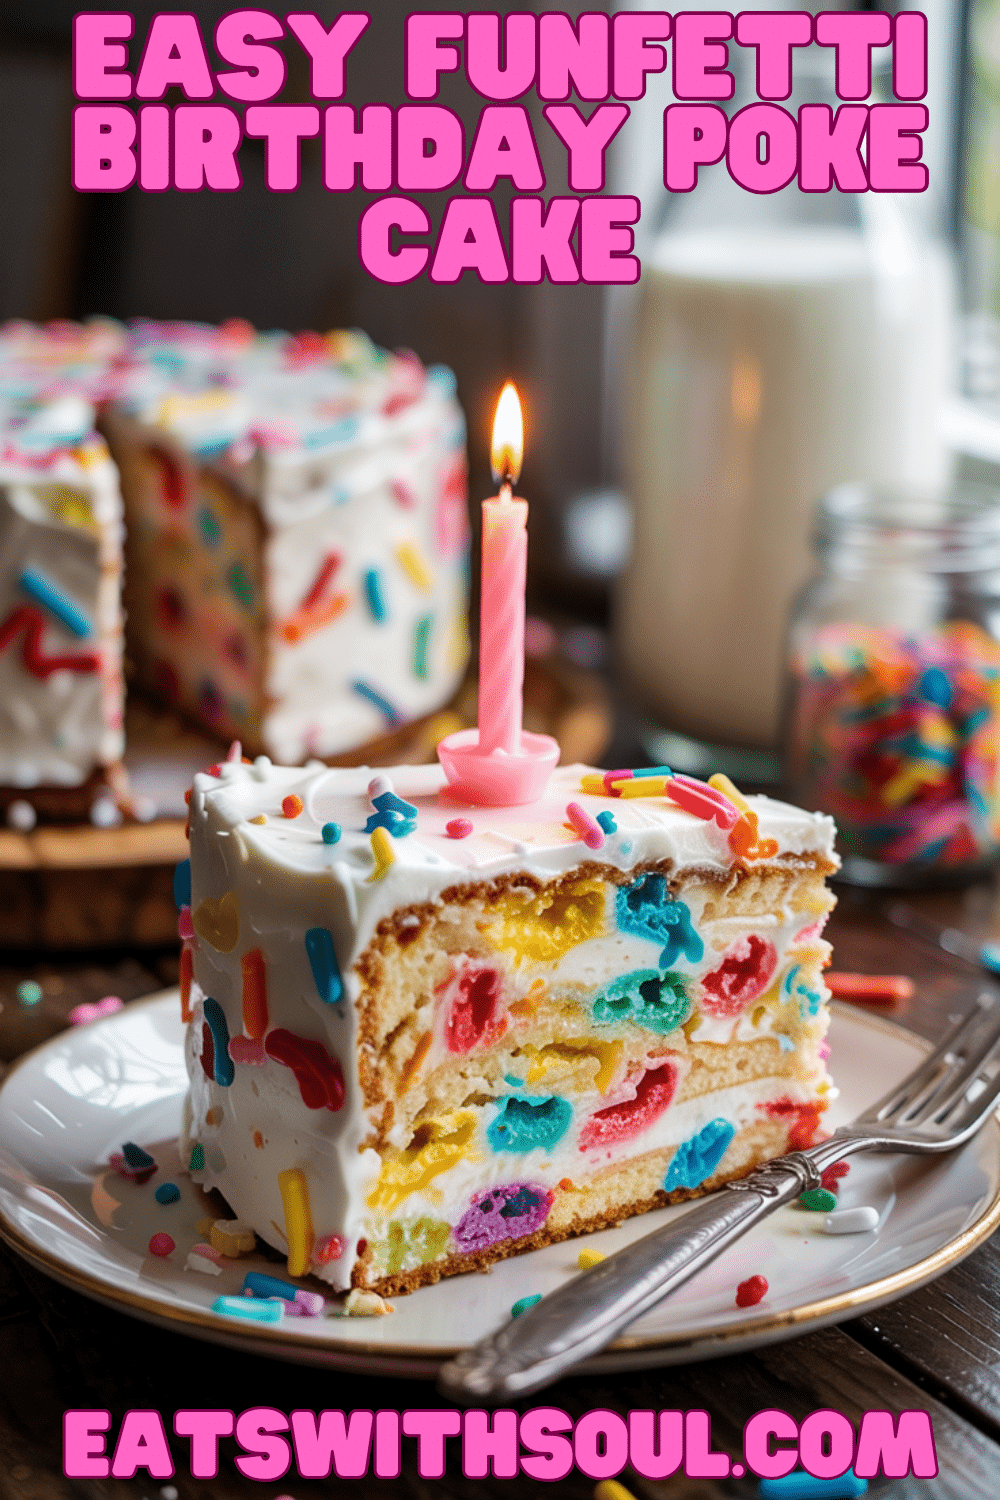
This Funfetti Birthday Poke Cake is all about pure, easy fun! It takes a simple vanilla cake mix, jazzes it up with colorful sprinkles, and then infuses it with creamy vanilla pudding through signature “poked” holes. Topped with a fluffy whipped topping and more sprinkles, it’s the epitome of a cheerful, celebratory dessert that’s incredibly simple to make.
My inspiration for this recipe comes from the joy of birthdays and the love of easy, crowd-pleasing desserts. Poke cakes are fantastic because they are inherently moist and flavorful, and adding the funfetti element just screams “party!” I wanted a recipe that anyone could make, regardless of baking skill, that would bring a smile to people’s faces.
This cake is perfect for kids’ birthdays, office parties, potlucks, or any time you need a festive and delicious dessert without a lot of fuss. It’s colorful, sweet, and guaranteed to be a hit. A perfect cake, to celebrate any occasion.
Nostalgic Appeal
Funfetti cake itself is pure nostalgia for many, instantly bringing back memories of childhood birthday parties and school celebrations. Poke cakes also have a nostalgic charm, often appearing at community gatherings and family potlucks in various Jell-O or pudding-filled forms.
This recipe combines both of those nostalgic elements into one incredibly fun and easy dessert. The bright sprinkles suspended in the cake and scattered on top, combined with the creamy pudding pockets, create a treat that feels both playful and comforting.
It’s a dessert that embraces simplicity and fun, reminding us that sometimes the easiest treats are the most enjoyable. A perfect cake, to make everyone happy.
Homemade Focus (with Lots of Smart Shortcuts!)
Let’s be honest, this Funfetti Birthday Poke Cake heavily relies on convenience items – cake mix, instant pudding, and frozen whipped topping. And that’s the beauty of it! This recipe is designed for maximum ease and fun, making it a fantastic semi-homemade project.
While you could make the cake, pudding, and whipped cream from scratch, the charm of this particular recipe lies in its simplicity and speed. It allows anyone to create a festive, delicious, and impressive-looking cake without requiring advanced baking skills or a lot of time.
It’s about using these shortcuts smartly to create something joyful and celebratory. It’s perfect for involving kids in the kitchen or for when you need a reliable party dessert quickly. The best balance between homemade and store-bought.
Flavor Goal
The primary flavor goal for this Funfetti Birthday Poke Cake is sweet, creamy vanilla with pops of fun from the sprinkles. The cake itself should be moist, thanks to the pudding seeping into the holes.
The vanilla pudding adds pockets of creamy richness throughout the cake. The whipped topping provides a light, fluffy contrast to the denser cake and pudding layers. The sprinkles mainly add visual appeal and that classic “birthday cake” flavor association.
The overall effect is a sweet, creamy, moist, and incredibly festive vanilla-flavored cake. It’s designed to be a crowd-pleasing, simple, and fun dessert. A delicious dessert, perfect for vanilla lovers.
Ingredient Insights
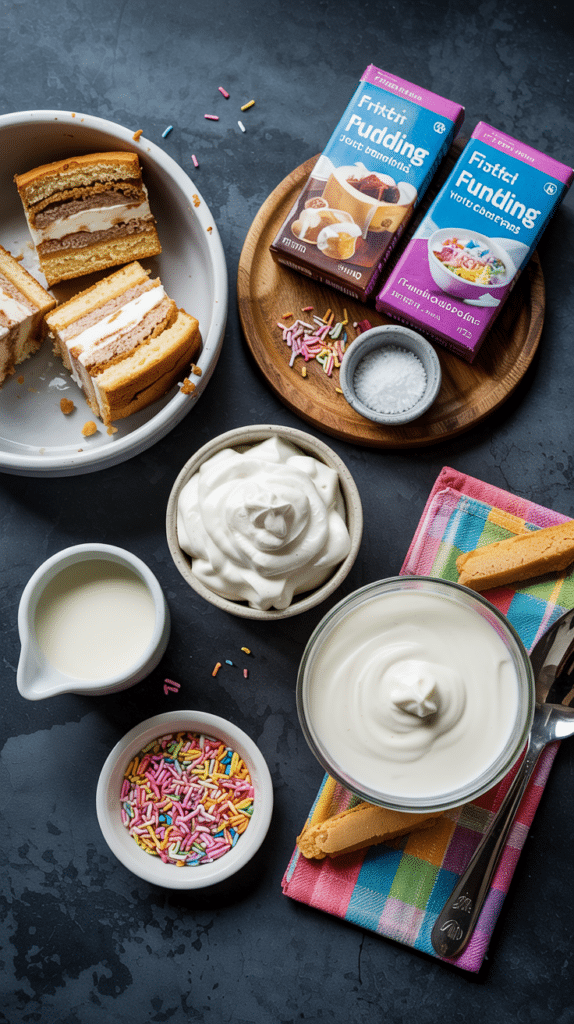
- Vanilla Cake Mix (plus ingredients called for on box): The base of our cake. A standard 15.25 oz box works perfectly. Remember you’ll need the eggs, oil/butter, and water/milk listed on the box instructions too!
- Vanilla Instant Pudding: Used twice – once mixed thinner to soak into the holes, and once mixed thicker to fold into the topping. Provides flavor and moisture. Make sure it’s instant pudding.
- Milk: Used to prepare the instant pudding mixes. The recipe specifies different amounts for the soaking pudding vs. the topping pudding.
- Frozen Whipped Topping (Thawed): Creates the light and fluffy frosting layer. Ensure it’s fully thawed before folding into the pudding.
- Rainbow Sprinkles: The “Funfetti” element! Jimmies (the long, skinny sprinkles) work best mixed into the batter as they tend to bleed less color than nonpareils (the tiny balls). Use any kind for decorating the top.
Essential Equipment
- 9×13 Inch Cake Pan: The standard size for this type of cake.
- Large Bowl: For mixing the cake batter.
- Medium Bowl: For mixing the pudding.
- Whisk: For mixing the pudding smoothly.
- Wooden Spoon Handle (or similar tool): For poking holes in the cooled cake. A thick chopstick or even the handle of a spatula can work.
- Piping Bag with Small Tip (Optional): Can make filling the holes with pudding easier, but a small spoon also works.
- Offset Spatula or Regular Spatula: For spreading the topping evenly.
Ingredients
- ▢ 1 (15.25 oz) box Vanilla cake mix (plus ingredients listed on box: typically eggs, oil/butter, water/milk)
- ▢ 2 (3.4 oz) boxes vanilla instant pudding
- ▢ 2 1/2 cups milk, divided (1 ½ cups + 1 cup)
- ▢ 4 cups frozen whipped topping, thawed
- ▢ 1/4 cup rainbow sprinkles, plus extra for decorating

Step-by-Step Instructions
1. Prepare and Bake the Cake:
- Preheat the oven according to the package directions on the vanilla cake mix.
- Grease and flour a 9×13 inch cake pan (or use baking spray with flour).
- Prepare the cake batter according to the package directions, using the ingredients listed on the box.
- Gently stir in 1/4 cup of rainbow sprinkles into the finished batter.
- Pour the batter into the prepared cake pan and spread evenly.
- Bake the cake according to the package directions, or until a toothpick inserted into the center comes out clean.
2. Cool and Poke Holes:
- Let the cake cool completely in the pan on a wire rack. This is important; poking a warm cake can make it crumble.
- Once cool, use the handle of a wooden spoon, a thick chopstick, or a similar tool (about 1/2 inch wide) to poke holes evenly all over the top of the cake. Poke down almost to the bottom, but not quite through.
3. Prepare and Add First Pudding Layer:
- In a medium bowl, whisk together one box of the instant pudding mix with 1 ½ cups of milk.
- Whisk just until it begins to thicken but is still quite runny and pourable (this happens quickly with instant pudding).
- Immediately use a small-tipped piping bag or a small spoon to carefully fill the holes in the cake with this pudding mixture.
- Spread any remaining pudding thinly over the entire top surface of the cake.
4. Prepare and Add Topping Layer:
- In the same (or another) medium bowl, mix the remaining box of instant pudding with the remaining 1 cup of milk.
- Whisk just until it begins to thicken (it will be thicker than the first batch).
- Gently fold the thawed frozen whipped topping into this thicker pudding mixture until well combined and fluffy.
5. Frost the Cake:
- Spread the whipped topping mixture evenly over the cake.
- If you wish, reserve some of the topping to pipe decorative swirls on top later.
6. Decorate and Chill:
- Decorate the top of the cake generously with extra rainbow sprinkles.
- If you reserved some topping, pipe swirls or dollops now.
- Refrigerate the cake for at least 30 minutes to allow the pudding layers to fully set before slicing and serving.
7. Serve:
- Slice and serve chilled.

Troubleshooting
- Cake is Dry: Could be overbaked. Follow package directions closely. The pudding soak should help add moisture.
- Pudding Didn’t Fill Holes Well: Ensure the first pudding mix (with 1.5 cups milk) was still runny when pouring. Work quickly as instant pudding sets fast. A piping bag helps direct the pudding into the holes.
- Topping is Runny: Ensure whipped topping was fully thawed but still cold. Don’t overmix when folding it into the second pudding batch. Ensure pudding was slightly thickened before folding. Chill time is essential for the topping to firm up.
Tips and Variations
- Let Cake Cool Completely: Essential before poking holes to prevent crumbling.
- Clean Poking: Wipe the end of your spoon handle periodically if it gets clogged with cake crumbs.
- Different Cake Flavors: Try yellow cake mix, white chocolate cake mix, or even strawberry cake mix.
- Different Pudding Flavors: Use cheesecake, white chocolate, or French vanilla pudding. You could even try a contrasting flavor like chocolate pudding with a yellow cake.
- Homemade Components: Feel free to substitute a homemade vanilla cake, homemade pudding, and/or homemade stabilized whipped cream if you prefer not to use mixes/frozen topping.
- Other Decorations: Use specific holiday sprinkles, chocolate shavings, or fresh fruit for decoration instead of just rainbow sprinkles.
Serving and Pairing Suggestions
- Serve Chilled: This cake must be served chilled.
- Birthday Parties: The perfect easy, festive birthday cake.
- Potlucks: Travels reasonably well (keep chilled) and is always a hit.
- With Ice Cream: A scoop of vanilla or strawberry ice cream on the side is delicious.
- With a glass of milk:
Nutritional Information
(Note: Highly estimated, per slice, assuming 12 slices. Will vary significantly based on cake mix, milk type, etc.)
- Calories: 350-450
- Fat: 15-20g
- Saturated Fat: 8-12g
- Cholesterol: 40-60mg
- Sodium: 300-400mg
- Total Carbohydrates: 50-60g
- Dietary Fiber: <1g
- Sugars: 30-40g
- Protein: 3-5g
Funfetti Birthday Poke Cake: An Easy and Festive Celebration Treat
Learn how to make a fun and easy Funfetti Birthday Poke Cake! This recipe uses cake mix, instant pudding, and whipped topping for a festive and delicious dessert.
Ingredients
▢ 1 (15.25 oz) box Vanilla cake mix (plus ingredients listed on box: typically eggs, oil/butter, water/milk)
▢ 2 (3.4 oz) boxes vanilla instant pudding
▢ 2 1/2 cups milk, divided (1 ½ cups + 1 cup)
▢ 4 cups frozen whipped topping, thawed
▢ 1/4 cup rainbow sprinkles, plus extra for decorating
Instructions
1. Prepare and Bake the Cake:
- Preheat the oven according to the package directions on the vanilla cake mix.
- Grease and flour a 9×13 inch cake pan (or use baking spray with flour).
- Prepare the cake batter according to the package directions, using the ingredients listed on the box.
- Gently stir in 1/4 cup of rainbow sprinkles into the finished batter.
- Pour the batter into the prepared cake pan and spread evenly.
- Bake the cake according to the package directions, or until a toothpick inserted into the center comes out clean.
2. Cool and Poke Holes:
- Let the cake cool completely in the pan on a wire rack. This is important; poking a warm cake can make it crumble.
- Once cool, use the handle of a wooden spoon, a thick chopstick, or a similar tool (about 1/2 inch wide) to poke holes evenly all over the top of the cake. Poke down almost to the bottom, but not quite through.
3. Prepare and Add First Pudding Layer:
- In a medium bowl, whisk together one box of the instant pudding mix with 1 ½ cups of milk.
- Whisk just until it begins to thicken but is still quite runny and pourable (this happens quickly with instant pudding).
- Immediately use a small-tipped piping bag or a small spoon to carefully fill the holes in the cake with this pudding mixture.
- Spread any remaining pudding thinly over the entire top surface of the cake.
4. Prepare and Add Topping Layer:
- In the same (or another) medium bowl, mix the remaining box of instant pudding with the remaining 1 cup of milk.
- Whisk just until it begins to thicken (it will be thicker than the first batch).
- Gently fold the thawed frozen whipped topping into this thicker pudding mixture until well combined and fluffy.
5. Frost the Cake:
- Spread the whipped topping mixture evenly over the cake.
- If you wish, reserve some of the topping to pipe decorative swirls on top later.
6. Decorate and Chill:
- Decorate the top of the cake generously with extra rainbow sprinkles.
- If you reserved some topping, pipe swirls or dollops now.
- Refrigerate the cake for at least 30 minutes to allow the pudding layers to fully set before slicing and serving.
7. Serve:
- Slice and serve chilled.
Recipe Summary and Q&A
Summary: This Funfetti Birthday Poke Cake uses a vanilla cake mix baked with sprinkles, cooled, and poked with holes. A thin vanilla pudding mixture fills the holes, then a thicker pudding mixed with whipped topping frosts the cake, finished with more sprinkles. The process involves baking the cake, poking holes, making two pudding consistencies, filling/topping, and chilling.
Q&A:
- Q: Do I have to use vanilla cake mix and vanilla pudding?
- A: No! Feel free to mix and match. Yellow cake with chocolate pudding, strawberry cake with cheesecake pudding – get creative!
- Q: Can I make this ahead of time?
- A: Yes, this cake is actually better made at least a few hours ahead, or even the day before, to allow the pudding to fully set and the flavors to meld. Keep it covered in the refrigerator.
- Q: How long will leftovers keep?
- A: Leftovers should be kept covered in the refrigerator and will last for about 3-4 days.
- Q: Can I freeze this cake?
- A: Yes, you can freeze the finished cake, well-wrapped, for up to a month. Thaw in the refrigerator before serving. The texture might change slightly.

