Introduction & Inspiration
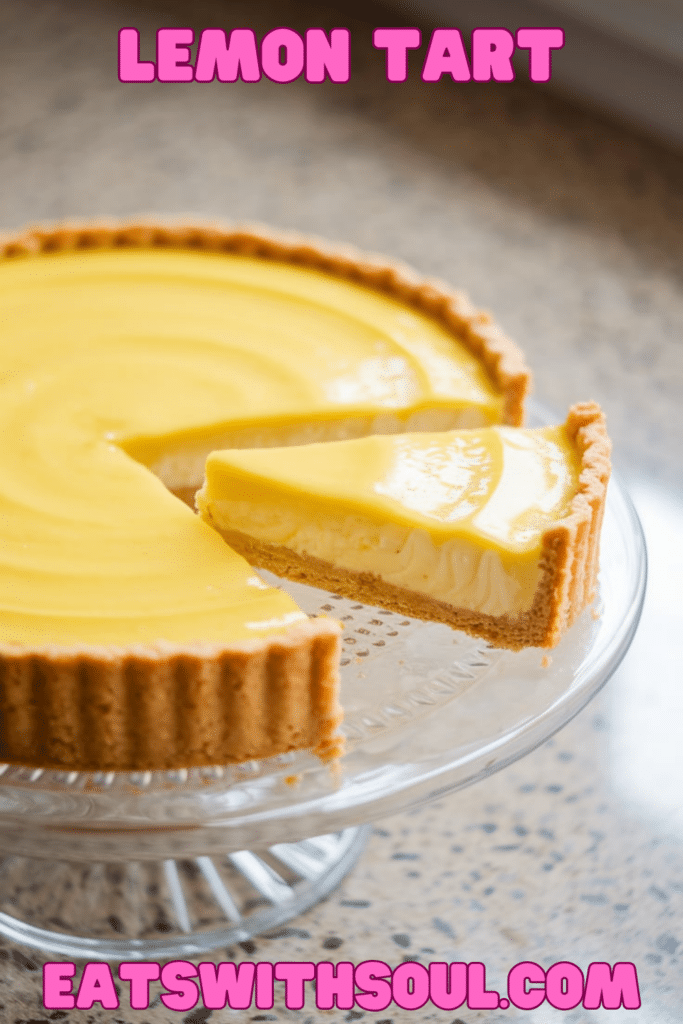
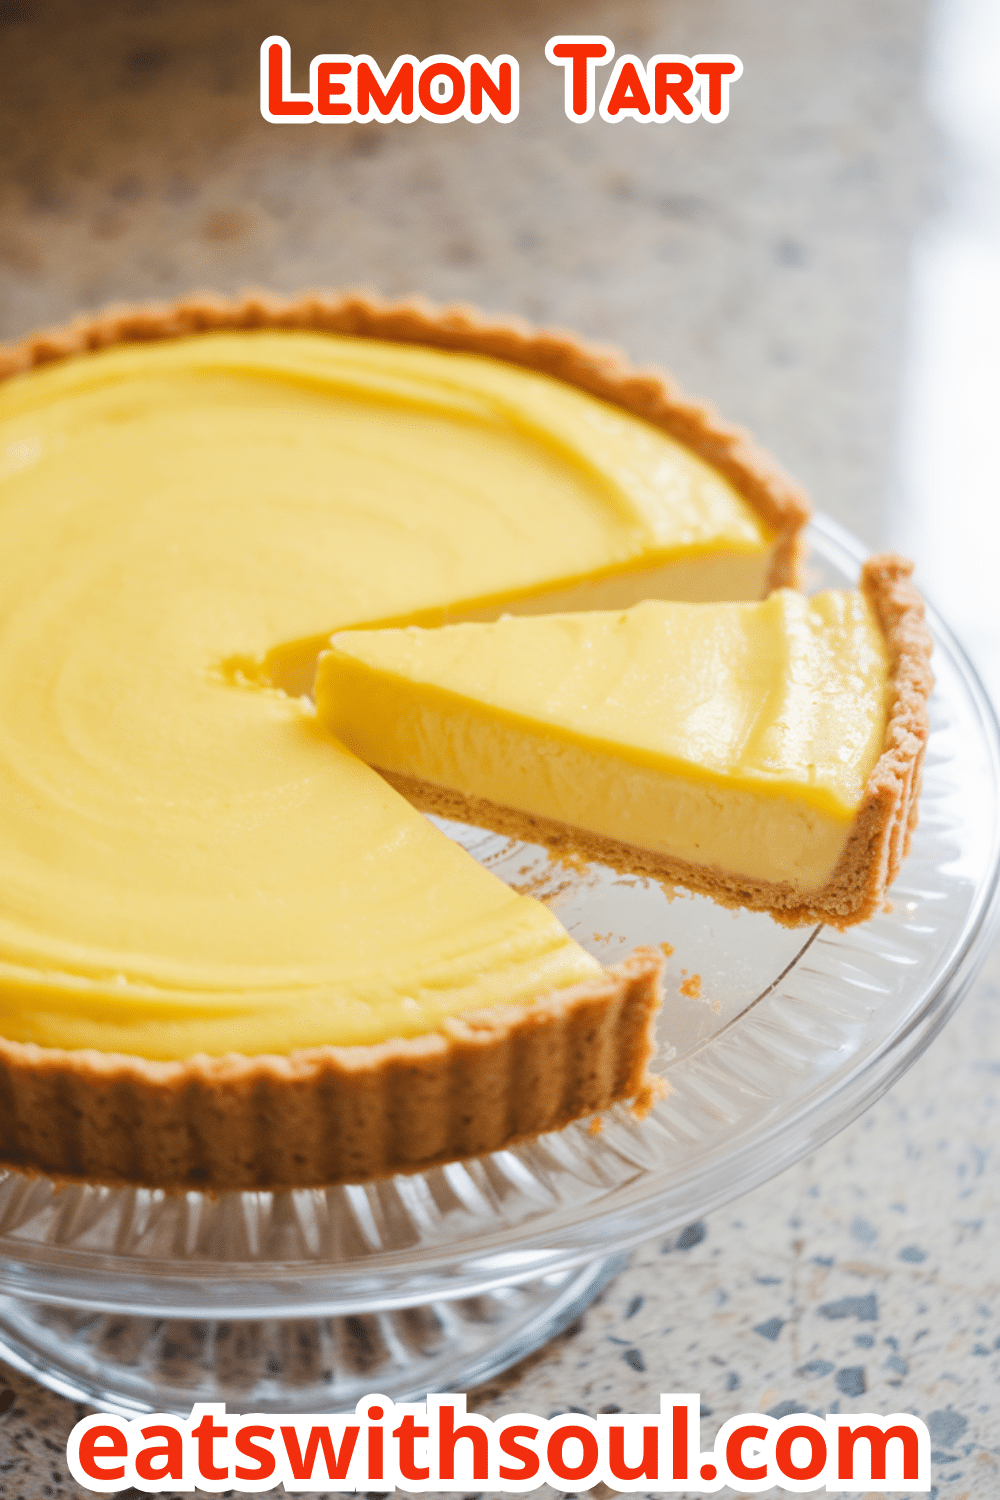
I’ve always found a certain magic in the kitchen, a place where simple ingredients transform into something extraordinary. This lemon tart recipe is a perfect example of that transformation – a journey from flour and butter to a bright, zesty dessert that captivates the senses.
My personal inspiration for baking often comes from memories. The scent of lemon zest instantly transports me back to my grandmother’s kitchen. She had this incredible ability to make even the simplest desserts feel special.
This lemon tart is an attempt to recreate that feeling: warmth, comfort, and the pure joy of sharing something delicious with loved ones. I wanted to create a recipe that was both approachable and impressive.
This recipe feels achievable for home bakers of all levels. Each element has its place, and it’s about getting it all right, for the perfect result.
Nostalgic Appeal
Lemon tart, for me, evokes a strong sense of nostalgia. It’s a classic dessert that has graced countless tables over generations. There’s a timeless quality to its bright, citrusy flavor.
It’s a reminder of simpler times, perhaps of childhood celebrations or family gatherings. The tart, bright flavor of lemon often sparks joy, with a familiar tang that is uplifting.
Many of us associate lemon desserts with sunny days and happy occasions. It is a dish that’s perfect to bring friends and family together.
This particular recipe builds upon that nostalgic foundation. While honoring traditional techniques, it offers a slightly updated approach for the modern baker, with a perfect balance of sweet and tart.
Homemade Focus
There’s an undeniable satisfaction that comes from making something entirely from scratch. This lemon tart is a testament to that philosophy: every component, from the buttery crust to the luscious filling, is crafted by hand.
While store-bought shortcuts might save time, they often compromise on flavor and quality. I am a big advocate for home baking, as the texture and freshness are unparalleled.
Taking the time to create each element yourself allows for complete control over the ingredients. You know exactly what’s going into your dessert, avoiding unnecessary additives or preservatives.
This homemade approach elevates the entire experience. It’s not just about the end result; it’s about the process itself. The act of kneading dough, whisking filling, and assembling the tart is incredibly rewarding.
Flavor Goal
The primary flavor goal of this lemon tart is to achieve a perfect balance between tartness and sweetness. The lemon should be the star – vibrant and refreshing – without becoming overwhelmingly sour.
The sweetness should complement the lemon, providing a pleasant counterpoint without masking its natural zestiness. I strive for a harmonious blend where each flavor enhances the other.
The texture also plays a crucial role. The crust should be crisp and buttery, providing a satisfying contrast to the smooth, creamy filling.
Finally, the subtle hint of vanilla in the whipped cream topping adds another layer of complexity, rounding out the flavors for a truly unforgettable dessert. The overall flavor is refreshingly delightful.
Ingredient Insights
For the Crust:
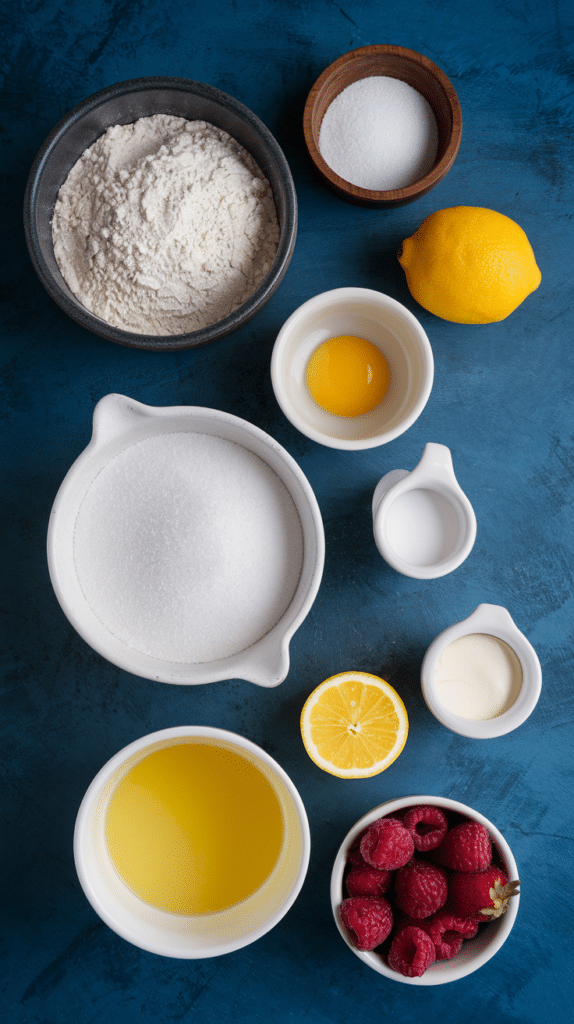
- All-Purpose Flour: The base of our crust, providing structure and a delicate texture. I prefer unbleached all-purpose flour for its slightly nuttier flavor.
- Granulated Sugar: A touch of sugar adds sweetness and contributes to the crust’s golden-brown color. Fine granules ensure even distribution.
- Salt: Essential in baking, even in sweet recipes, to enhance other flavors and balance the sweetness.
- Cold Unsalted Butter: The key to a flaky crust. Cold butter pieces create steam in the oven, resulting in layers. Unsalted butter gives control over saltiness.
- Egg Yolk: Adds richness and binds the dough, contributing to the crust’s golden color. Only the yolk is used to avoid a tough crust.
- Ice Water: Crucial for keeping the butter cold, preventing gluten development and ensuring a tender crust.
For the Filling:
- Granulated Sugar: Provides sweetness that balances the lemon’s tartness, contributing to the filling’s smooth texture.
- Cornstarch: Our thickening agent, creating that luscious, silky consistency. Essential for the perfect set.
- All-Purpose Flour: A small amount further stabilizes the filling, working with the cornstarch to prevent runniness.
- Kosher Salt: Enhances flavors, balances sweetness, and brings out the lemon’s bright notes.
- Egg Yolks: Provide richness, color, and a velvety texture, crucial for a classic lemon curd consistency.
- Unsalted Butter: Adds luxurious smoothness and richness, melting into the warm custard. Quality matters here.
- Fresh Lemon Juice: The star! Freshly squeezed lemon juice provides the vibrant, tangy flavor. Bottled juice cannot compare.
- Lemon Zest: Adds intense lemon aroma and flavor. Zest only the yellow part, avoiding the bitter white pith.
For the Topping:
- Heavy Cream: The base of our whipped topping, creating a light, airy texture. Must be very cold.
- Granulated Sugar: Sweetens the whipped cream and helps stabilize it. Don’t over-sweeten, as the tart is already sweet.
- Vanilla Extract: Enhances the whipped cream’s flavor, complementing the lemon. Pure extract provides the best flavor.
Essential Equipment
- 9-inch Round Fluted Tart Pan with a Removable Bottom: Essential for the classic tart shape. The removable bottom allows for easy release, and fluted edges create a beautiful presentation.
- Mixing Bowls (Large and Small): Needed for various stages: crust, filling, and whipped cream. Glass or stainless steel are preferred.
- Pastry Cutter or Your Fingers: To cut cold butter into flour. Fingers work too; work quickly to keep butter cold.
- Rolling Pin: For rolling out the dough. A smooth, even pin ensures consistent thickness.
- Parchment Paper: Lines the crust during blind baking, preventing sticking and making weight removal easy.
- Baking Weights or Dried Beans: Essential for blind baking, preventing the crust from puffing up.
- Medium Saucepan: For cooking the filling. A heavy-bottomed pan distributes heat evenly, preventing scorching.
- Whisk: For combining ingredients and ensuring a smooth filling. A balloon whisk is effective.
- Fork: For mixing smaller ingredients and pricking the crust before baking.
- Plastic Wrap: For protecting and refrigerating dough and filling.
Ingredients
For the Crust:
- 1 cup all-purpose flour
- 2 1/2 Tbsp. granulated sugar
- 1/4 tsp. salt
- 6 Tbsp. cold unsalted butter, cut into 1/2-inch pieces
- 1 large egg yolk
- 4 tsp. ice water
For the Filling:
- 1 1/4 cups granulated sugar
- 1/3 cup cornstarch
- 2 Tbsp. all-purpose flour
- 1/2 tsp. kosher salt
- 5 large egg yolks
- 1/4 cup unsalted butter
- 1/4 cup fresh lemon juice (from 2 lemons)
- 1 Tbsp. lemon zest
For the Topping:
- 1 1/4 cups heavy cream
- 2 Tbsp. granulated sugar
- 1 tsp. vanilla extract
- Fresh berries, for serving (optional)

Step-by-Step Instructions
1. Prepare the Crust:
- In a large bowl, whisk together the flour, sugar, and salt.
- Cut in the cold butter using a pastry cutter or your fingers until pea-sized pieces form.
- In a small bowl, stir together the egg yolk and ice water.
- Stir the egg yolk mixture into the flour mixture until the dough just comes together; gently knead.
- Form the dough into a disc, wrap tightly with plastic wrap, and refrigerate for at least 1 hour (or up to 3 days).
2. Roll and Chill the Crust:
- On a lightly floured surface, roll the chilled dough into an 11-inch circle.
- Transfer to a 9-inch tart pan, press into the pan, and trim the edges.
- Fold the overhang inward, pressing it against the sides for a thicker edge.
- Refrigerate for 1 hour (or freeze for 30 minutes).
3. Blind Bake the Crust:
- Preheat oven to 400°F (200°C) during the last 20 minutes of chilling.
- Line the crust with parchment paper; fill with baking weights or dried beans.
- Bake until edges are lightly golden, 10-12 minutes.
- Remove weights and parchment; prick the bottom with a fork.
- Bake until golden brown all over, 8-12 minutes more. Cool to room temperature.
4. Make the Lemon Filling:
- In a medium saucepan, whisk together the sugar, cornstarch, flour, and salt.
- Gradually whisk in 1 1/2 cups of cold water until smooth.
- Cook over medium heat, stirring frequently, until boiling (about 5 minutes).
- Boil for 1 minute, stirring constantly, then remove from heat.
5. Temper the Egg Yolks and Finish the Filling:
- In a small bowl, whisk the egg yolks.
- Slowly add 1/4 cup of the hot sugar mixture to the yolks while whisking (tempering).
- Gradually stir the tempered yolk mixture back into the saucepan.
- Cook over medium heat, stirring constantly, until a thermometer reads 175°F to 180°F (79°C to 82°C), 1-2 minutes.
- Remove from heat; stir in the butter, lemon juice, and zest until butter melts.
6. Chill the Tart:
- Pour the warm filling into the cooled crust.
- Let cool for 15 minutes at room temperature.
- Press plastic wrap directly onto the filling’s surface.
- Refrigerate for at least 4 hours, or preferably overnight.
7. Make the Whipped Cream Topping:
- In a medium bowl, whisk together the heavy cream, sugar, and vanilla extract.
- Whisk until stiff peaks form, 1-2 minutes.
8. Assemble and Serve:
- Spread the whipped cream over the chilled tart.
- Serve with fresh berries, if desired.

Troubleshooting
- Crust Shrinks: Ensure dough is well-chilled, avoid overworking, and use baking weights.
- Crust is Crumbly: May be too dry; add a tiny bit more ice water next time, being careful not to add too much.
- Filling is Runny: Wasn’t cooked long enough, or not enough cornstarch. Cook to the specified temperature, using a thermometer.
- Filling is Too Tart/Sweet: Taste before pouring into crust; adjust lemon juice or sugar.
Tips and Variations
- Make Ahead: Crust: up to 3 days in fridge. Filling: 1 day in advance. Assemble a few hours before serving.
- Citrus Variations: Try lime, grapefruit, or orange (adjust sugar as needed). Lemon-lime is delicious.
- Meringue Topping: Substitute whipped cream with a fluffy, toasted meringue.
- Spice it Up: Add cardamom, ginger, cinnamon, or nutmeg to the filling.
Serving and Pairing Suggestions
- Serve Chilled: Best served cold; let sit at room temperature briefly before serving.
- Garnish: Fresh berries or a dusting of powdered sugar.
- Pairings: Crisp white wine (Sauvignon Blanc, Pinot Grigio), hot tea (Earl Grey, chamomile), or sparkling water with lemon.
Nutritional Information
(Note: Estimated, per slice, assuming 8 slices. Varies with ingredients.)
- Calories: 350-400
- Fat: 20-25g
- Saturated Fat: 12-15g
- Cholesterol: 100-120mg
- Sodium: 150-200mg
- Total Carbohydrates: 40-45g
- Dietary Fiber: 1-2g
- Sugars: 25-30g
- Protein: 5-7g
Zesty Lemon Tart: A Homemade Delight
Discover how to make a classic lemon tart from scratch, with a buttery crust, a luscious lemon filling, and a light whipped cream topping.
Ingredients
For the Crust:
- 1 cup all-purpose flour
- 2 1/2 Tbsp. granulated sugar
- 1/4 tsp. salt
- 6 Tbsp. cold unsalted butter, cut into 1/2-inch pieces
- 1 large egg yolk
- 4 tsp. ice water
For the Filling:
- 1 1/4 cups granulated sugar
- 1/3 cup cornstarch
- 2 Tbsp. all-purpose flour
- 1/2 tsp. kosher salt
- 5 large egg yolks
- 1/4 cup unsalted butter
- 1/4 cup fresh lemon juice (from 2 lemons)
- 1 Tbsp. lemon zest
For the Topping:
- 1 1/4 cups heavy cream
- 2 Tbsp. granulated sugar
- 1 tsp. vanilla extract
- Fresh berries, for serving (optional)
Instructions
1. Prepare the Crust:
-
In a large bowl, whisk together the flour, sugar, and salt.
-
Cut in the cold butter using a pastry cutter or your fingers until pea-sized pieces form.
-
In a small bowl, stir together the egg yolk and ice water.
-
Stir the egg yolk mixture into the flour mixture until the dough just comes together; gently knead.
-
Form the dough into a disc, wrap tightly with plastic wrap, and refrigerate for at least 1 hour (or up to 3 days).
2. Roll and Chill the Crust:
-
On a lightly floured surface, roll the chilled dough into an 11-inch circle.
-
Transfer to a 9-inch tart pan, press into the pan, and trim the edges.
-
Fold the overhang inward, pressing it against the sides for a thicker edge.
-
Refrigerate for 1 hour (or freeze for 30 minutes).
3. Blind Bake the Crust:
-
Preheat oven to 400°F (200°C) during the last 20 minutes of chilling.
-
Line the crust with parchment paper; fill with baking weights or dried beans.
-
Bake until edges are lightly golden, 10-12 minutes.
-
Remove weights and parchment; prick the bottom with a fork.
-
Bake until golden brown all over, 8-12 minutes more. Cool to room temperature.
4. Make the Lemon Filling:
-
In a medium saucepan, whisk together the sugar, cornstarch, flour, and salt.
-
Gradually whisk in 1 1/2 cups of cold water until smooth.
-
Cook over medium heat, stirring frequently, until boiling (about 5 minutes).
-
Boil for 1 minute, stirring constantly, then remove from heat.
5. Temper the Egg Yolks and Finish the Filling:
-
In a small bowl, whisk the egg yolks.
-
Slowly add 1/4 cup of the hot sugar mixture to the yolks while whisking (tempering).
-
Gradually stir the tempered yolk mixture back into the saucepan.
-
Cook over medium heat, stirring constantly, until a thermometer reads 175°F to 180°F (79°C to 82°C), 1-2 minutes.
-
Remove from heat; stir in the butter, lemon juice, and zest until butter melts.
6. Chill the Tart:
-
Pour the warm filling into the cooled crust.
-
Let cool for 15 minutes at room temperature.
-
Press plastic wrap directly onto the filling’s surface.
-
Refrigerate for at least 4 hours, or preferably overnight.
7. Make the Whipped Cream Topping:
-
In a medium bowl, whisk together the heavy cream, sugar, and vanilla extract.
-
Whisk until stiff peaks form, 1-2 minutes.
8. Assemble and Serve:
-
Spread the whipped cream over the chilled tart.
-
Serve with fresh berries, if desired.
Recipe Summary and Q&A
Summary: This recipe guides you through making a lemon tart from scratch: a buttery crust, a vibrant lemon filling, and whipped cream. It involves blind baking, cooking a lemon curd, and whipping cream.
Q&A:
- Q: Store-bought crust?
- A: Recommended to make from scratch, but a 9-inch store-bought crust works in a pinch.
- Q: Make ahead?
- A: Yes! Crust: 3 days ahead. Filling: 1 day. Assemble a few hours before.
- Q: Runny filling?
- A: Cook longer, to 175-180°F. Use a thermometer, and check cornstarch amount.
- Q: Bottled lemon juice?
- A: Strongly recommend fresh lemon juice for the best flavor.
- Q: Storage?
- A: Airtight container in the refrigerator, for two to three days.
- Q: No tart pan?
- A: Use a pie pan, preferably lined with parchment.
- Q: Whipped cream problems?
- A: Use very cold cream, chill bowl/whisk, and don’t overwhip.
- Q: Other fruits? *A: Yes! Berries are great. Try a thin layer of jam under the filling.
- Q: Blind bake necessary? *A: Yes. The crust would be soggy without it.

